Background
When you have created and launched an AWS Linux EC2 instance, you need to be able to connect to it from your computer using the SSH protocol. This data recipe will use the Mac Terminal window command line.
Prerequisites
- You must have an AWS account. If you don’t have an account, create one now.
Note: You will need to provide credit card information for your new account.
- You will need to create and launch a Linux EC2 instance to connect to. Instructions for this are found in the How to Create a Basic Elastic Cloud Compute (EC2) Instance data recipe.
Connect to an EC2 Instance using SSH
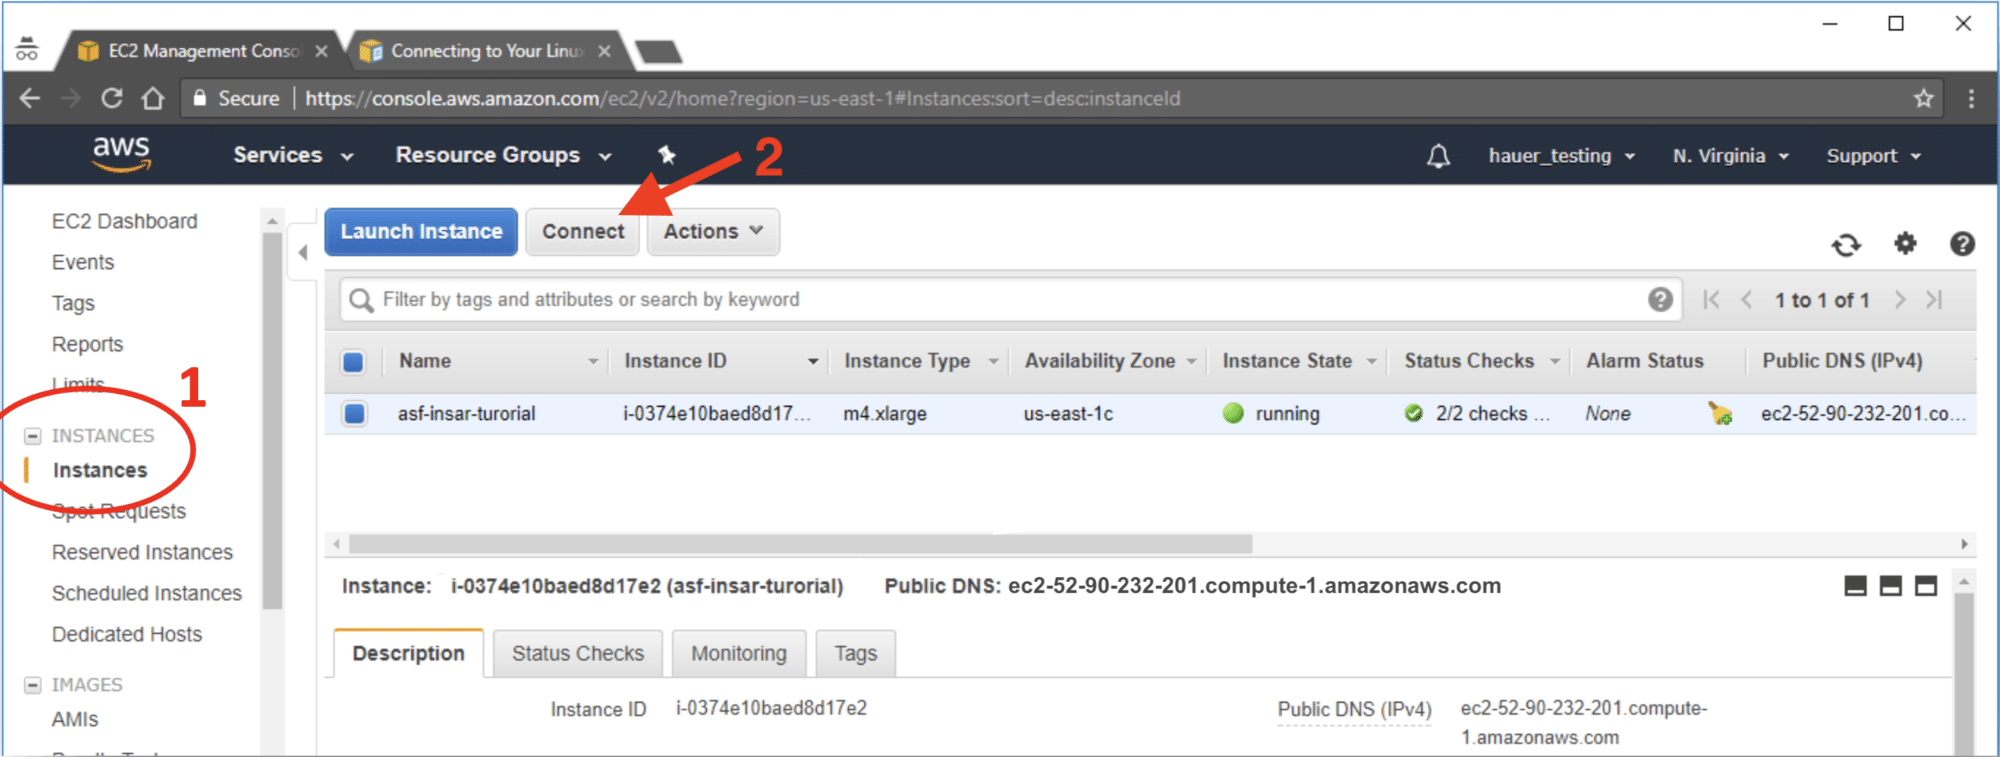
- In the AWS EC2 Management Console, click on Instances in the left menu (1) under EC2 Dashboard.
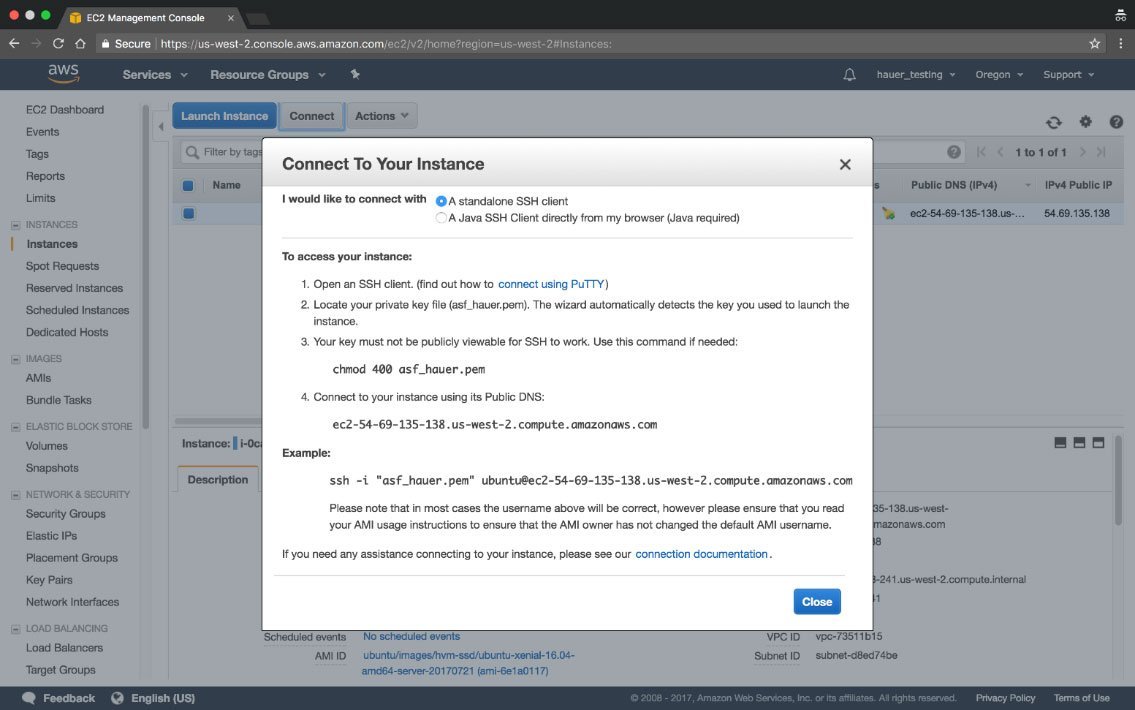
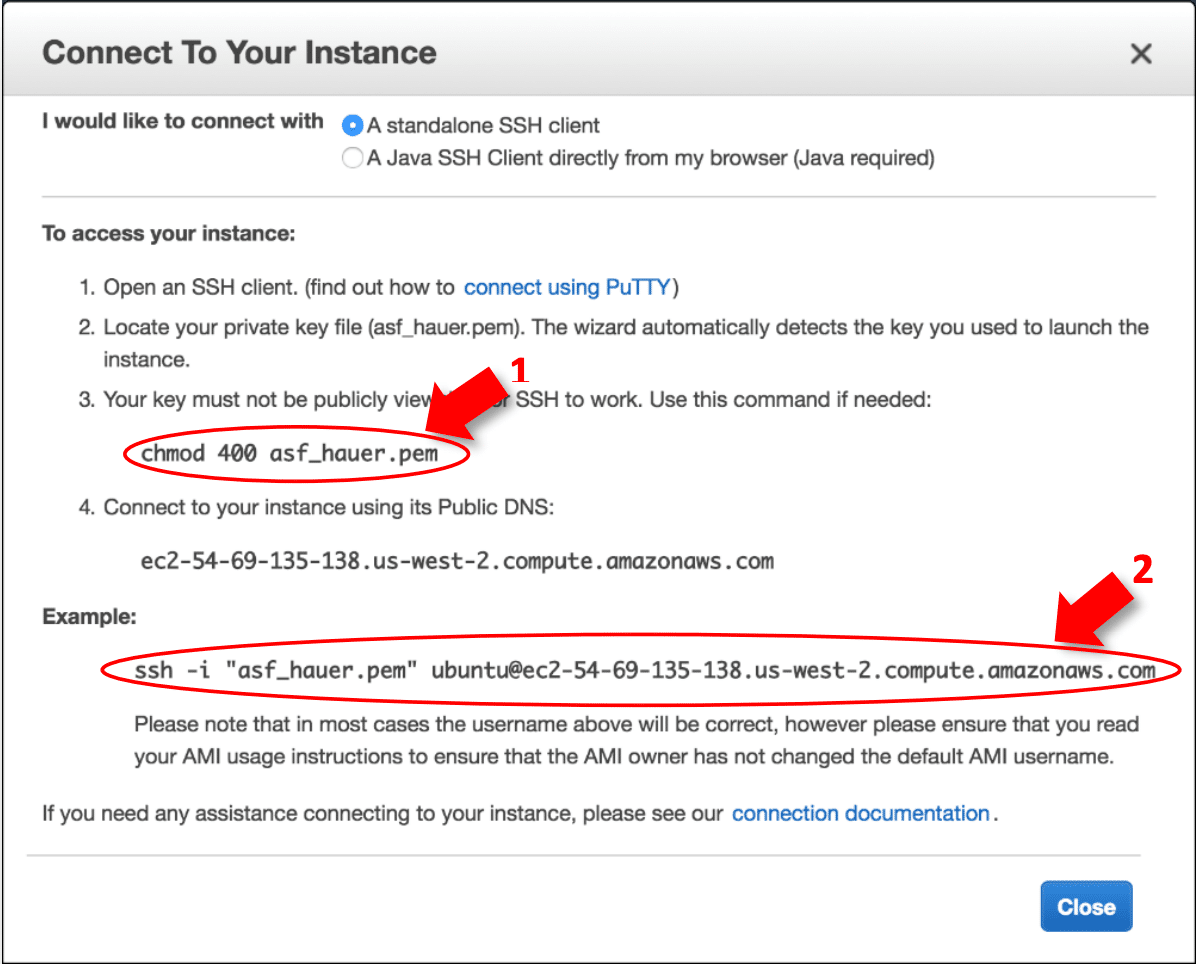
- Click on the Connect button (2) to open the Connect To Your Instance window.
- You will copy and paste information from this window to your Mac Terminal window later.
- Next, open a Terminal window on your Mac and navigate using the cd (change directory) command to the folder containing the private key file (.pem) created during the EC2 configuration process. This is usually in the Downloads folder unless you moved the file to another folder.
- In the AWS EC2 Management Console, click on Instances in the left menu (1) under EC2 Dashboard.
cd ~/<path to pem_folder>
Example: $ cd ~/Downloads
To view the contents of a directory:
ls -ltr
- Change access permissions for the private key file (.pem)
- At the Terminal prompt, type:
- Change access permissions for the private key file (.pem)
chmod 400 <filename.pem>
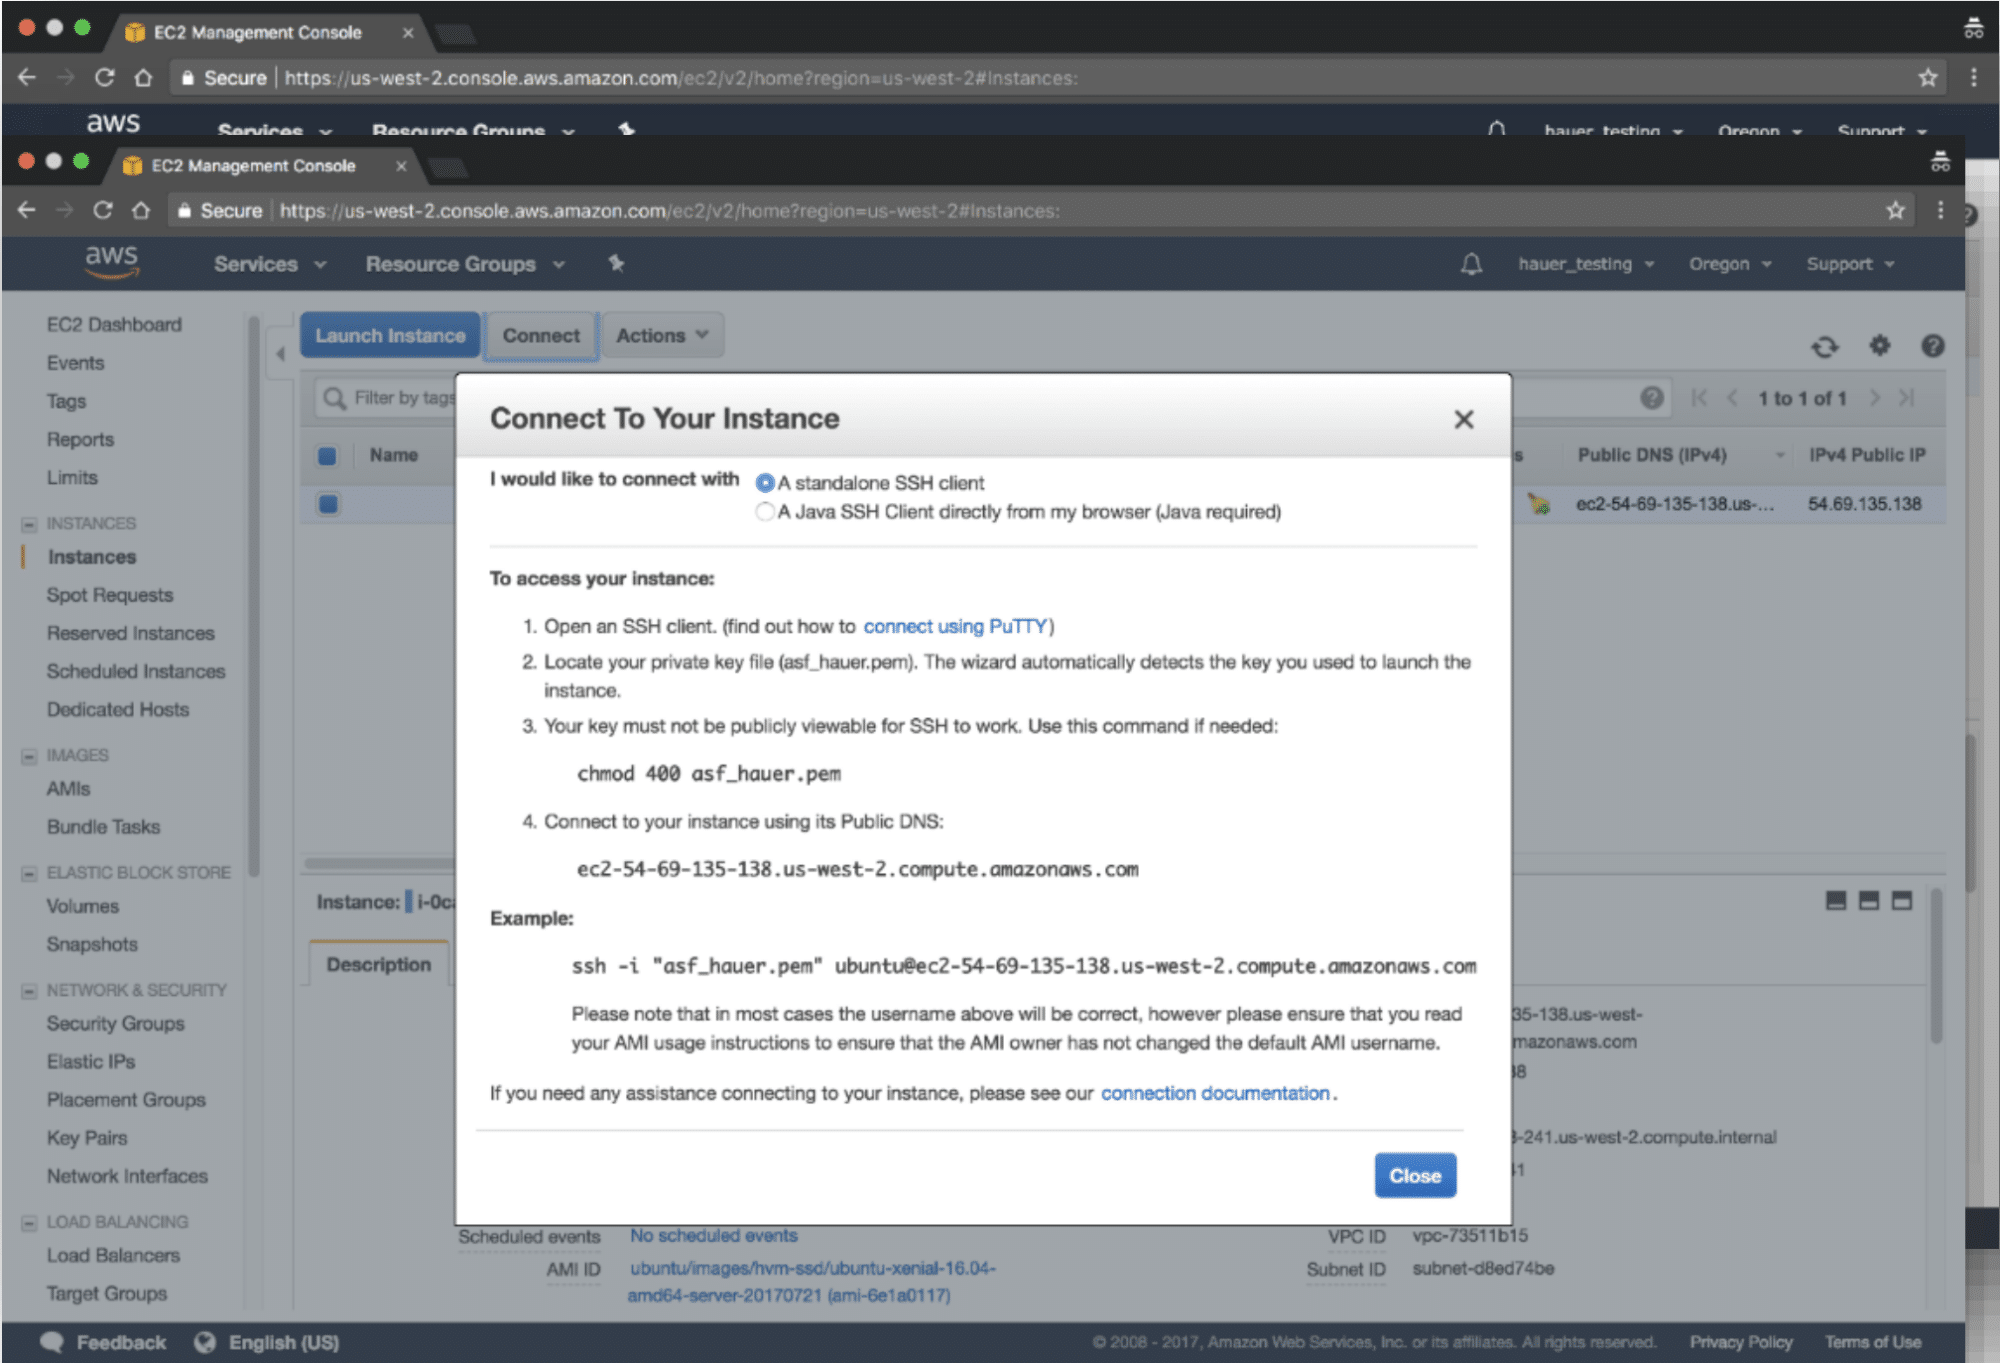
- Or copy the command (1) from the Connect To Your Instance window and paste at the Terminal prompt.
- Press Enter
- From the Connect to Your Instance window, copy the complete SSH command under Example: (arrow 2)
- This string includes your filename.pem, the username ubuntu, and the Public DNS of your EC2 Instance.
- Paste the string at the Terminal prompt
- Delete the double-quotes enclosing filename.pem
- Press Enter
- Type “yes” when prompted “Are you sure you want to continue connecting?”
- Press Enter
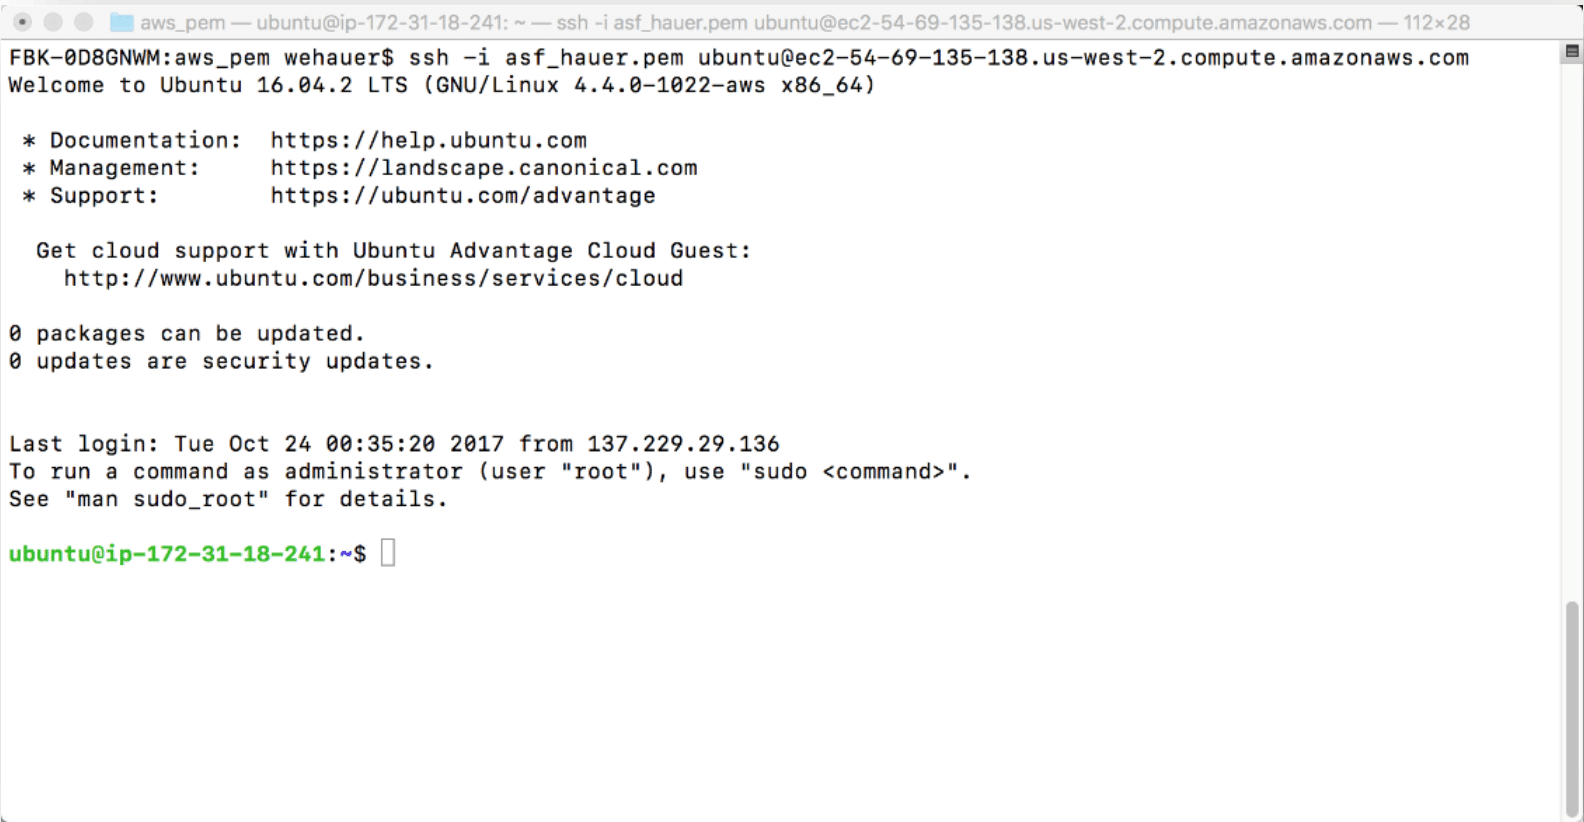
- A terminal window appears for your EC2 instance.
- From the Connect to Your Instance window, copy the complete SSH command under Example: (arrow 2)
Move Data into an EC2 Instance
Important: The commands described in the “Move Data into an EC2 Instance” and “Move Data Out of an EC2 Instance” sections are run from your Mac computer.
Move a file (for example, a file to be processed) from your computer to your EC2 Instance Home directory of user ubuntu using SCP (secure copy protocol).
At the Terminal prompt of your Mac OS computer:
scp -i private.pem your_filename
ubuntu@EC2instance_public_DNS:/home/ubuntu/
- Example of moving file S1A_EW_GRDM.zip from your computer to your EC2 Instance:
scp -i AWSrecipe.pem S1A_EW_GRDM.zip [email protected]:/home/ubuntu/
- Command syntax: < indicates optional input>
scp -i pemfile.pem your_filename ubuntu@Public_DNS://
Move Data Out of an EC2 Instance
Move a file (for example, a processing product) from your EC2 instance ubuntu directory to your computer using SCP (secure copy protocol).
At the Terminal prompt of your Mac OS computer:
scp -i private.pem ubuntu@Public_DNS:/home/ubuntu/filename ~/local_folder
- Example of moving file F2_unw_phase.tif from your EC2 Instance to your Mac computer Downloads folder:
scp -i asf_aws.pem [email protected]:/home/ubuntu/PRODUCT/F2_unw_phase.tif ~/Downloads
- Command syntax: < indicates optional input>
scp -i pemfile.pem ubuntu@PublicDNS://your_filename ~//local_directory
Note: If you store your .pem file in a directory other than the directory you are working in, you must provide a path for that directory in the SSH command.
Example:
ssh –i ~/Documents/aws_pem/asf_hauer.pem [email protected]
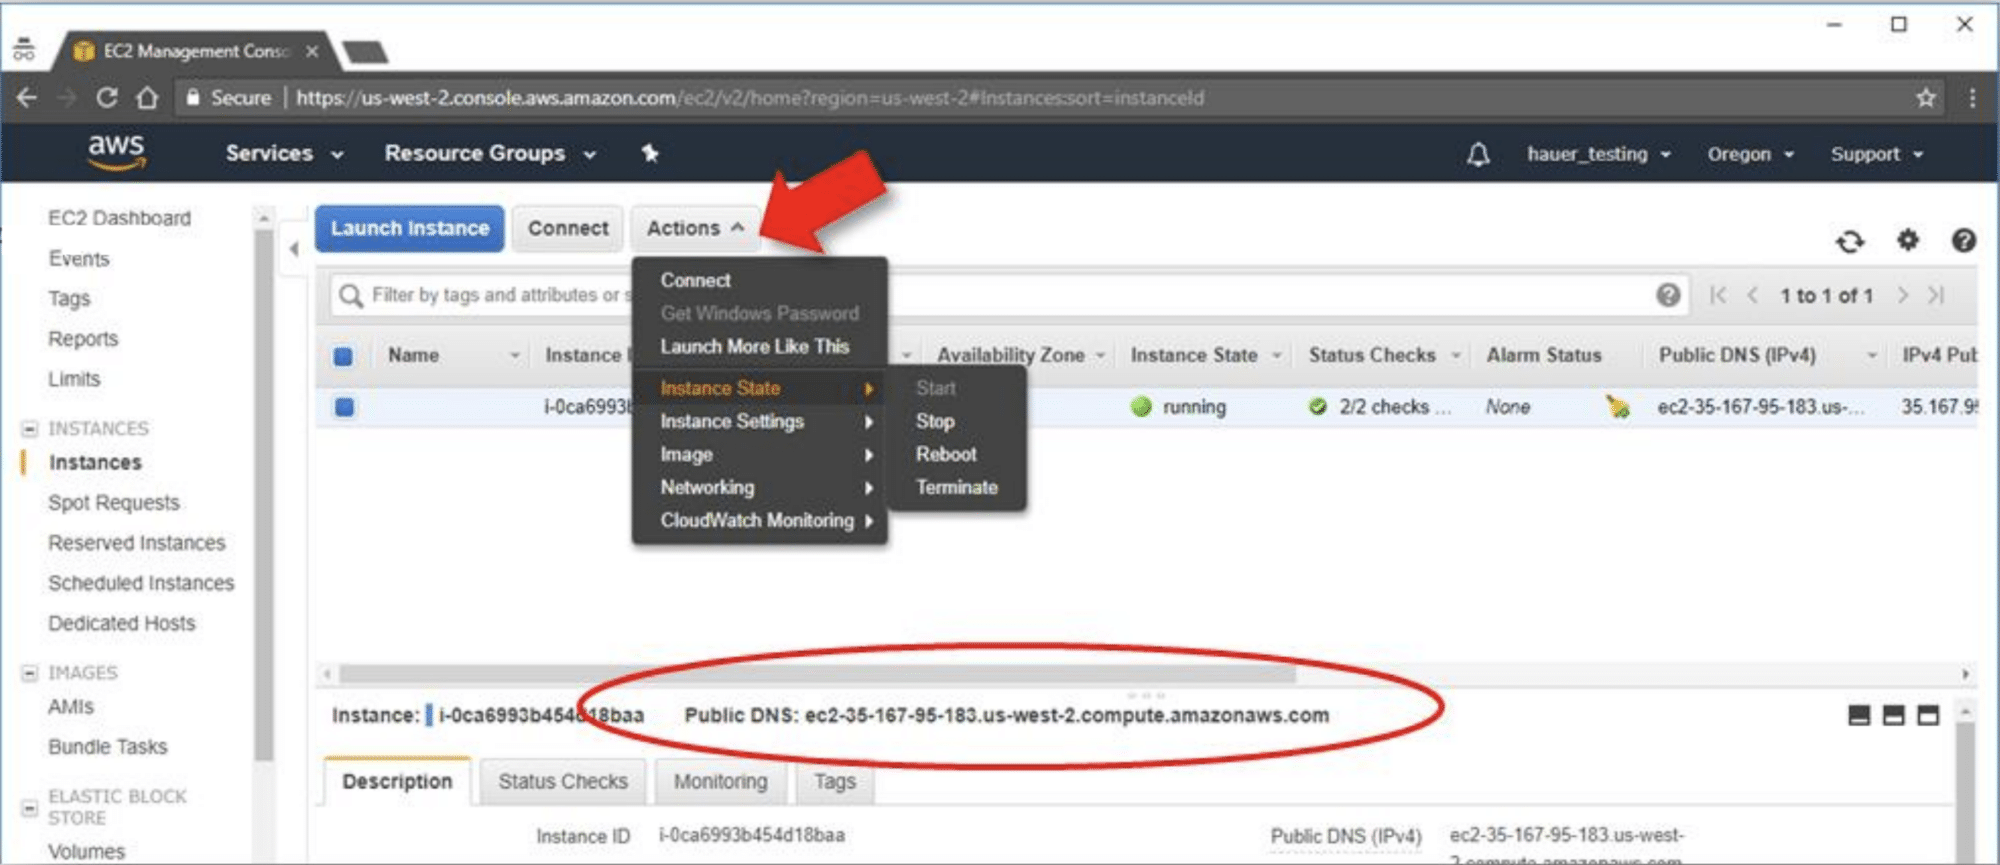
Note: If you Stop your instance using the EC2 Management Console (Action > Instance State > Stop), when you restart it, you will be assigned a new Public DNS.
Use this new DNS to reconnect. (See Connect to an EC2 Instance using SSH — Step 4)


