Background
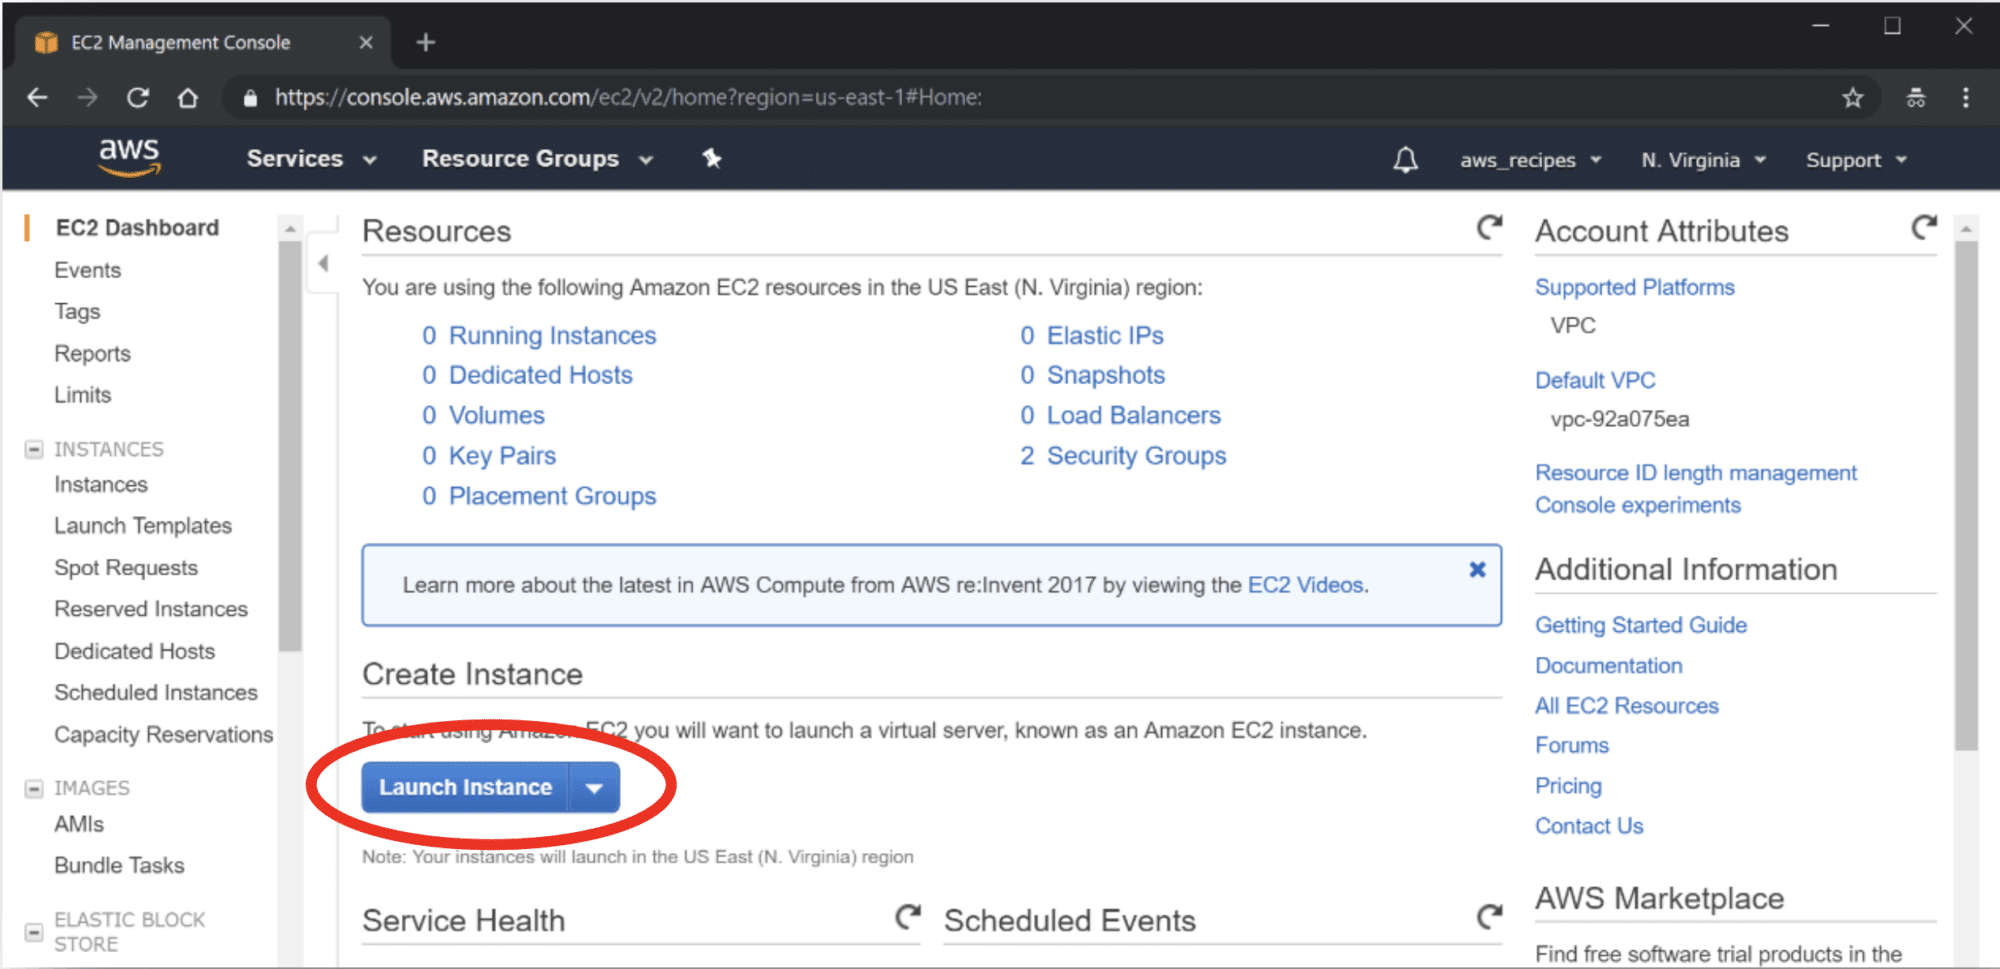
Amazon Web Services (AWS) EC2 Instances are virtual computers that you create to perform processing operations in place of using your desktop or laptop computer, or other on-premises computing hardware. They are customizable based on your computing needs and consist of your choice of operating system, type of CPU, amount of memory, storage, and the security settings that determine how your instance can be accessed.
This recipe demonstrates how to create and configure a basic Linux EC2 instance using an AWS Free Tier option. AWS Free Tier provides new users an opportunity to gain experience using AWS products and services at no charge. For example, they offer 750 hours of Linux and Windows t2.micro EC2 instances each month for one year.
Once your Linux EC2 instance is created and launched, you can connect to it via SSH. Files can be transferred between your computer and your instance using SCP (Mac and Windows command-line interface) or WinSCP (Windows graphical interface). Instructions for connecting to your instance are provided in separate recipes.
Important: Once you have completed your processing, the EC2 instance must be stopped or terminated to prevent additional, unexpected charges.
Prerequisites
You must have an AWS account. If you don’t have an account, create one now.
Note: You will need to provide credit card information for your new account.
Steps for Creating a Basic EC2 Instance
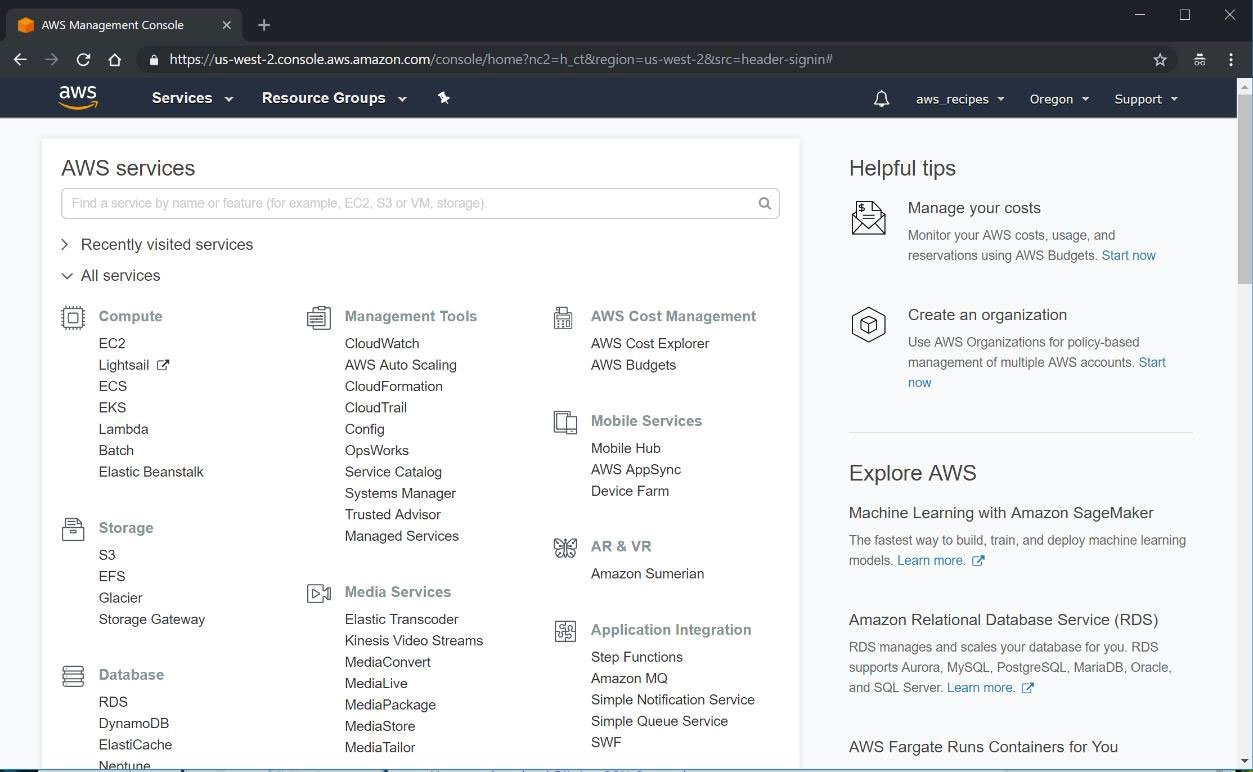
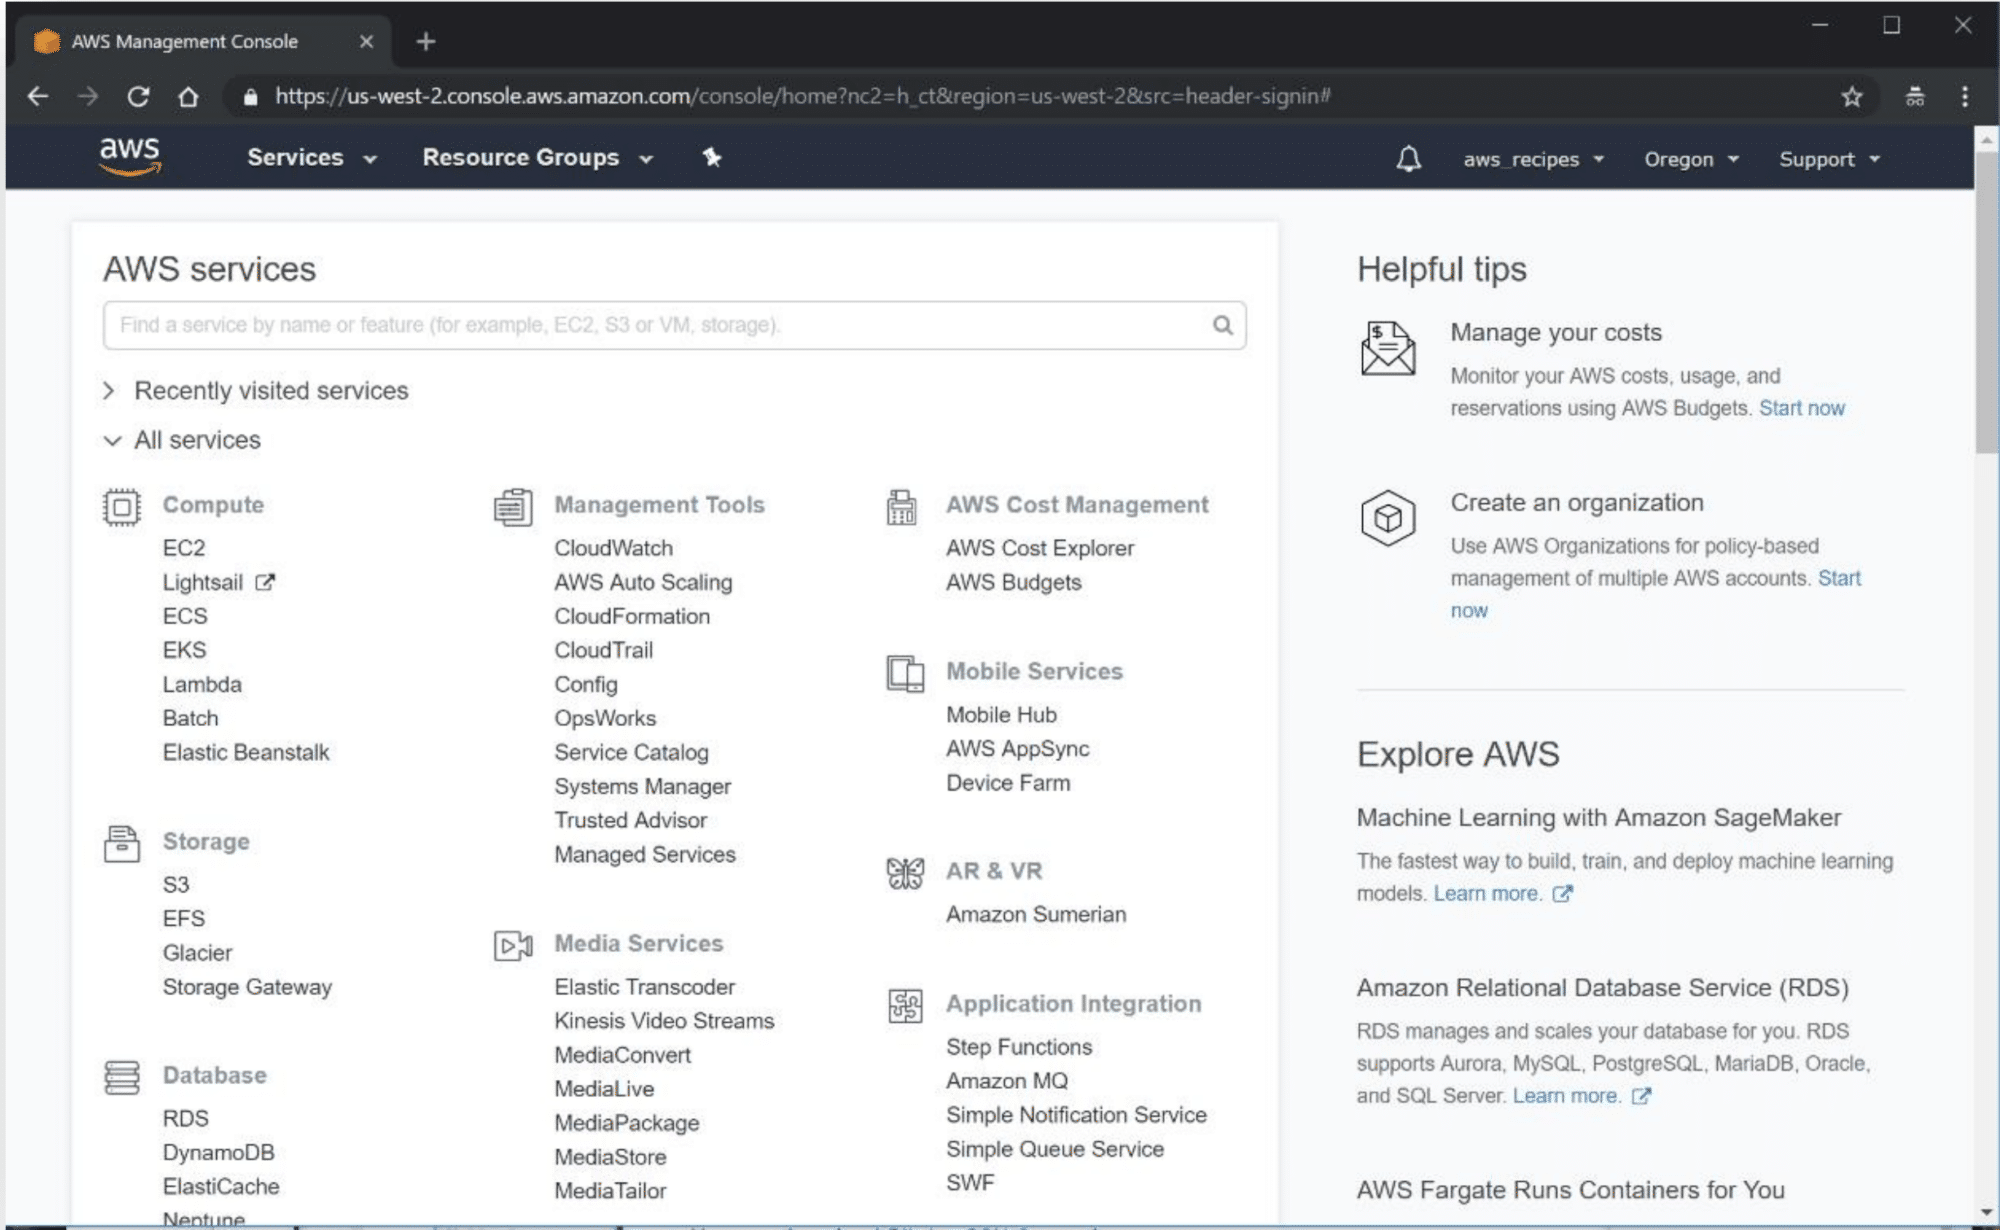
- Sign in to AWS. The AWS Management Console will open.
- Select an AWS region to launch your Instance in.
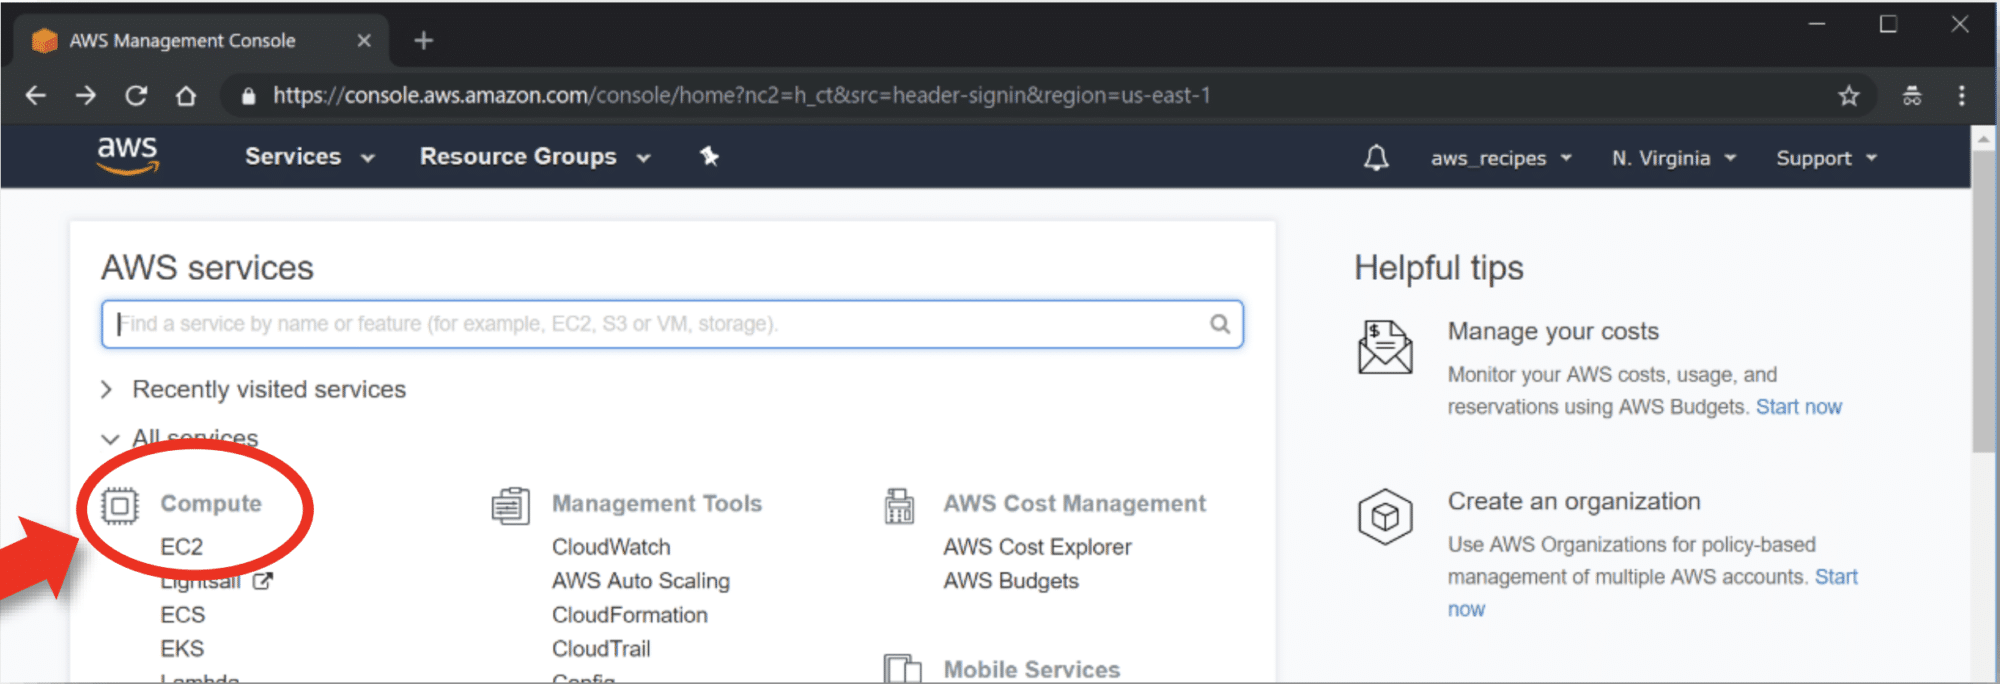
- Select a region from the drop-down menu next to your account name in the upper right.
- For this recipe, select US East (N. Virginia)
- Select a region from the drop-down menu next to your account name in the upper right.
- Select an AWS region to launch your Instance in.
Note: There are many factors that can be considered when selecting a region. Read more about the factors that influence the cost of processing based on the region you select.
- Choose an Instance Type
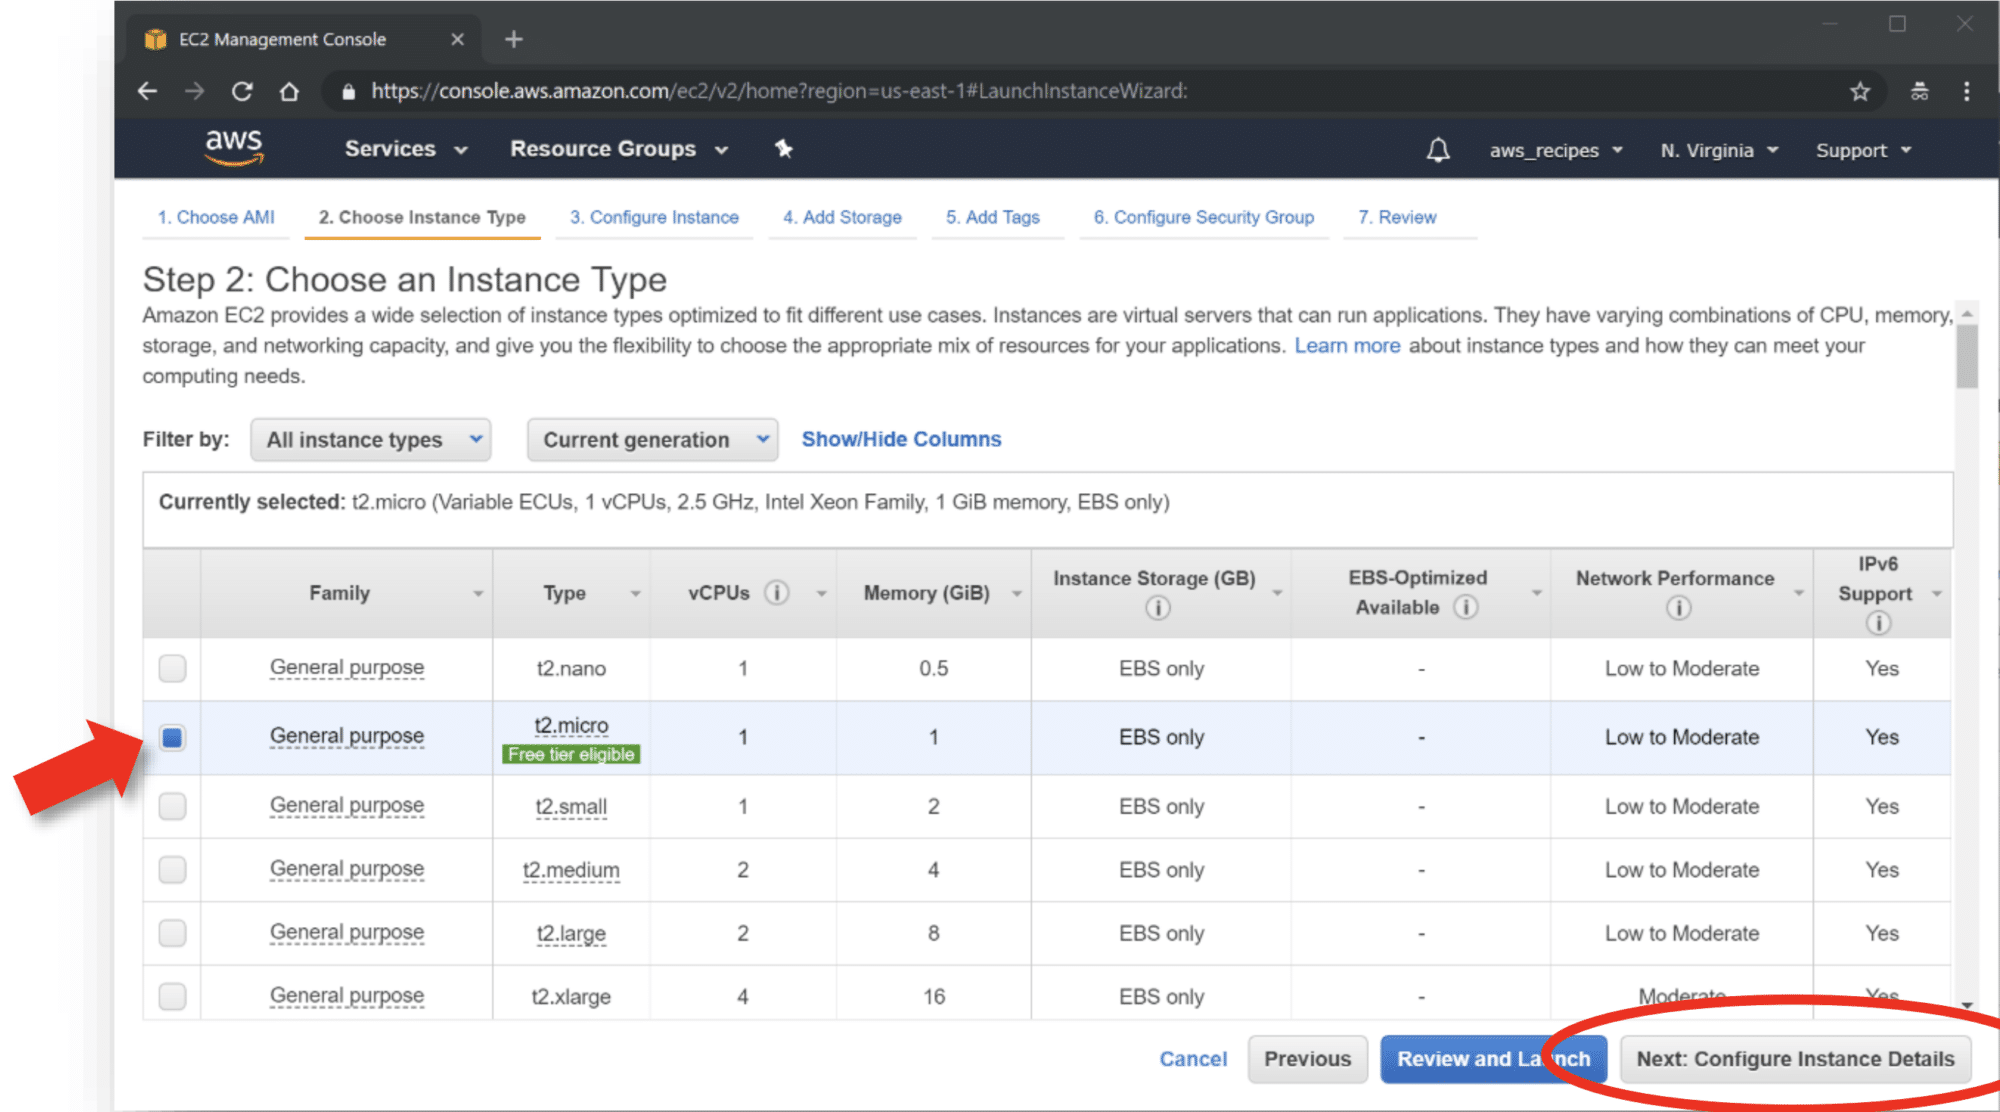
- If it isn’t preselected, select the t2.micro [Free tier eligible] instance type. This is a small instance type and suitable for the needs of this recipe. The type of instance you select should be configured to your particular computing needs. AWS has a wide selection of preconfigured instance types.
- After selecting the instance type, click on Next: Configure Instance Details at the bottom.
- Choose an Instance Type
- Configure Instance Details
- Since we are only configuring one instance, the defaults on this page do not need to be changed. Click on Next: Add Storage at the bottom.
- Add Storage
- The AWS General Purpose SSD (gp2) storage offers a good balance of price and performance for running a wide variety of applications. The amount of storage you set will depend on the needs of the application you run. For this recipe, leave the default 8 GB unchanged and click on Next: Add Tags.
- Configure Instance Details
- Add Tags
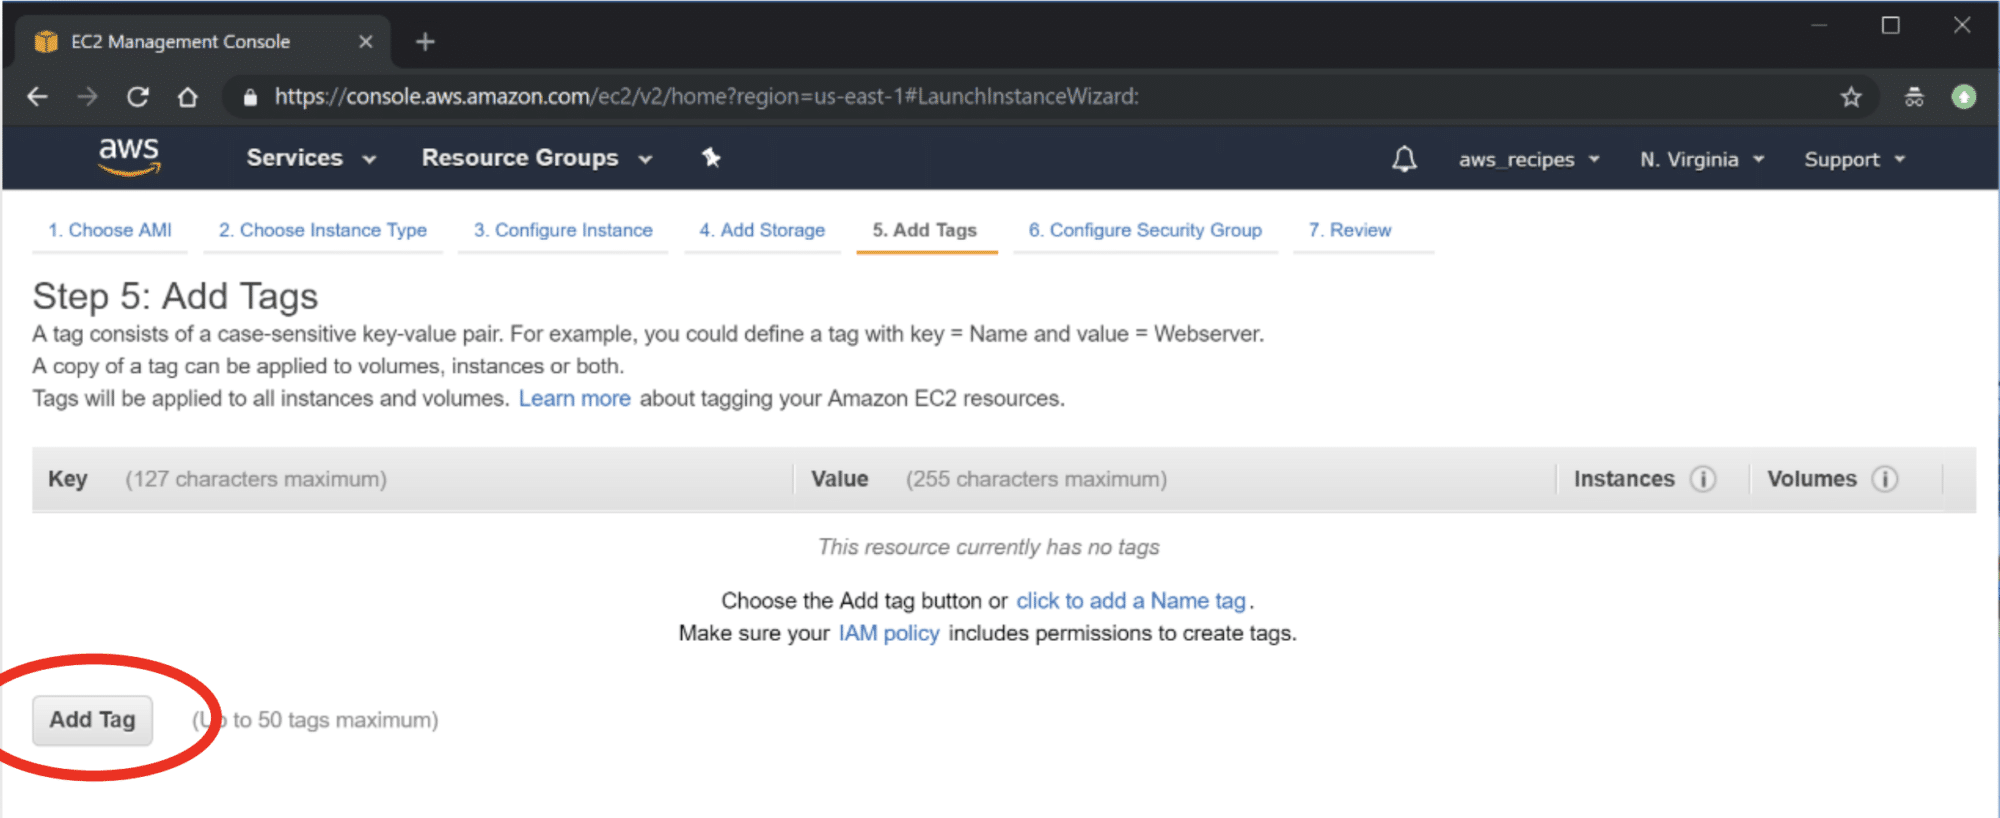
- A tag is a label that identifies an AWS resource and consists of a Key and Value. Tags can be used to organize, search for, and filter multiple resources.
- In the Step 5: Add Tags window, click on the Add Tag button.
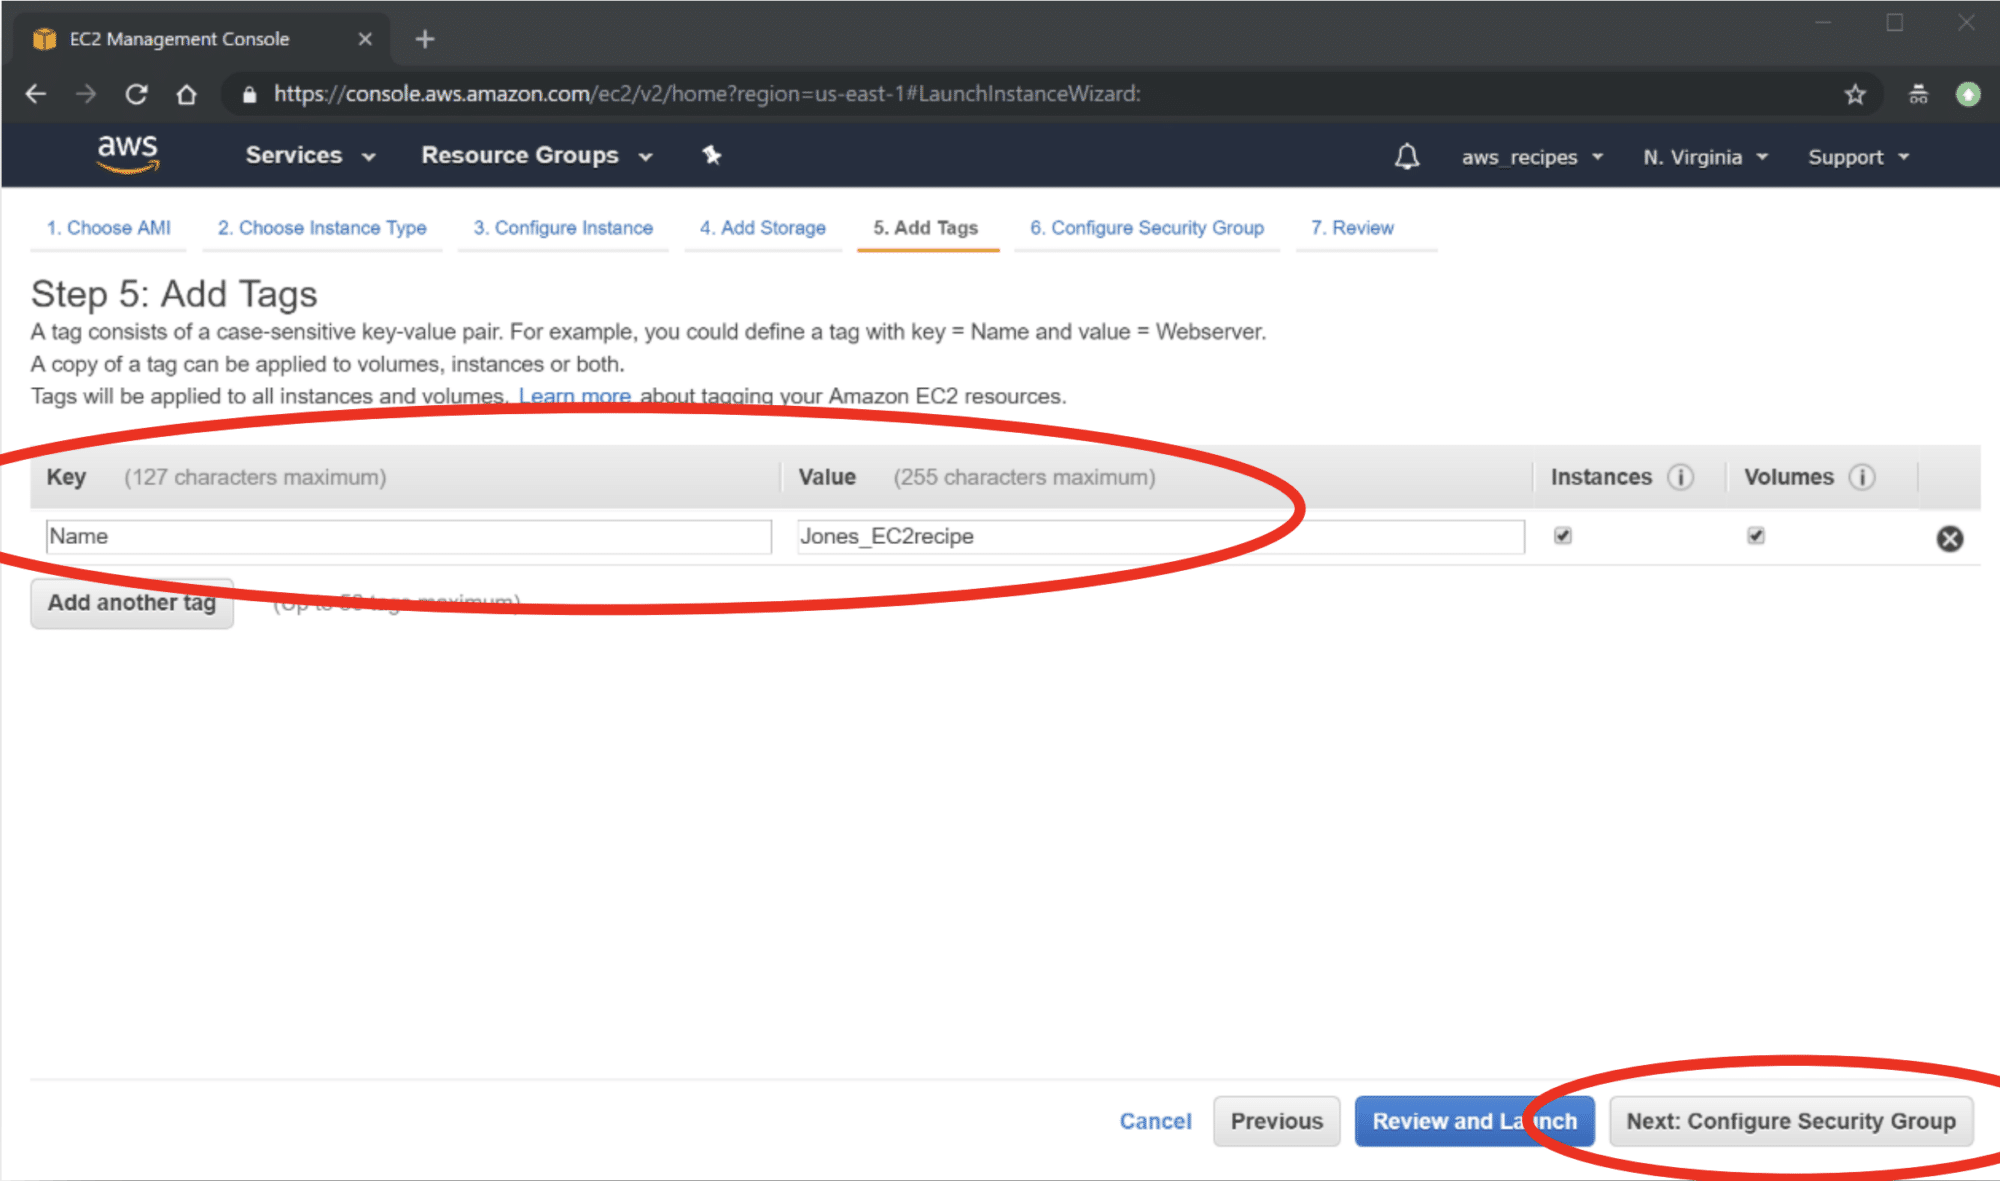
- Under Key, type “Name.” Under Value, type something that identifies the resource; say, your last name and a short descriptor. For example, Jones_EC2recipe.
- After you have tagged your EC2 Instance, click on Next: Configure a Security Group.
- Add Tags
- Configure Security Group
A Security Group determines how your instance can be accessed. For this recipe, you want to limit access to only the computer you are working from.
- Make sure Create a new security group is selected (1).
- Identify the new security by assigning a label next to Security group name (2). For example: name it Jones_EC2recipe_securityGroup.
- Under Source, select My IP from the dropdown menu (3). The public IP address of the computer you are working from will automatically be listed. This means that only the computer that has this IP address can connect to the instance.
Note: This is a very basic Linux instance security configuration. More complicated security group rules can be configured; for example, allowing access by a range of IP addresses. Read more about security group settings.
- Leave the other settings at their default values.
- Click on Review and Launch at the bottom of the screen.
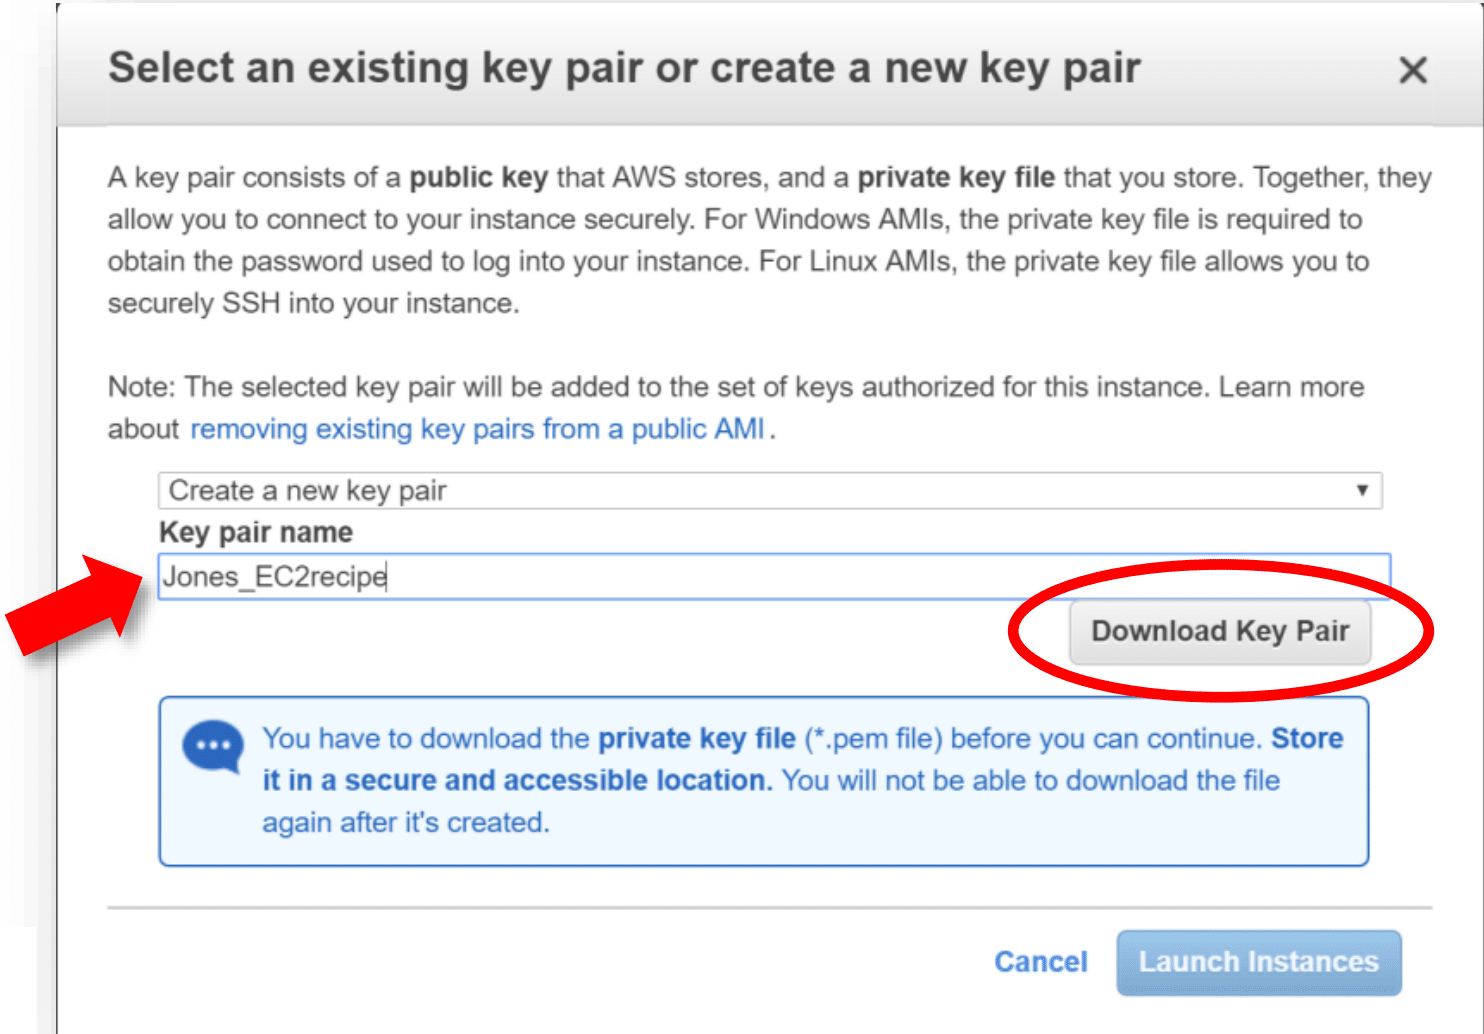
- The pop-up window that appears next allows you to create a key pair — “public” and “private” keys — that will be used for securely connecting to your instance from your computer. The public key will be a part of your EC2 instance configuration and the private key will be kept on your local PC or Mac.
- Select Create a new key pair from the drop-down menu
- Next, name the new key pair; for example, Jones_EC2recipe.
- Click on the Download Key Pair button. The private key file (.pem) will download to your default downloads folder. You can move the file into any folder.
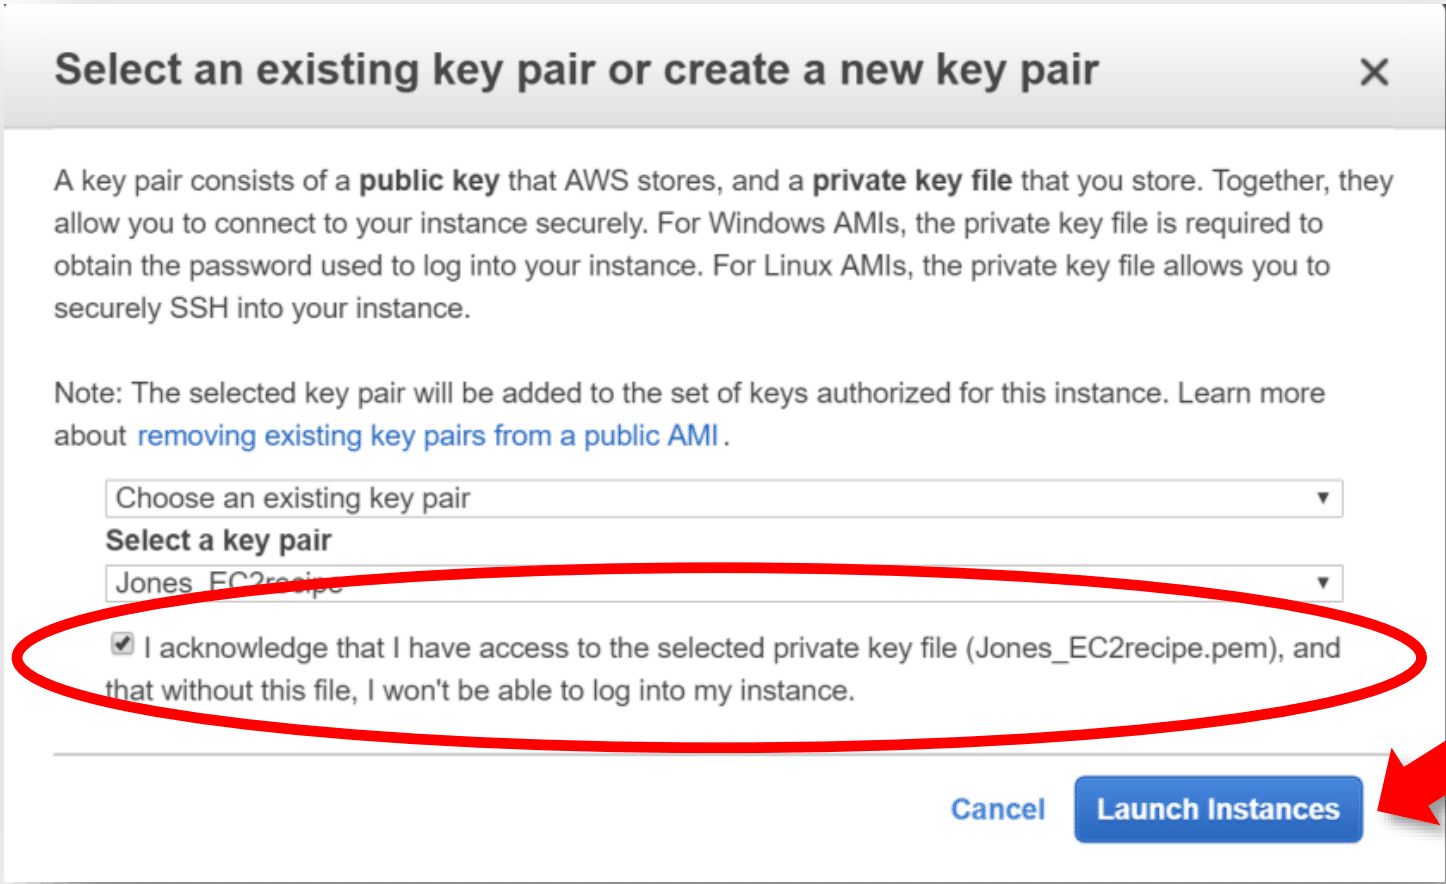
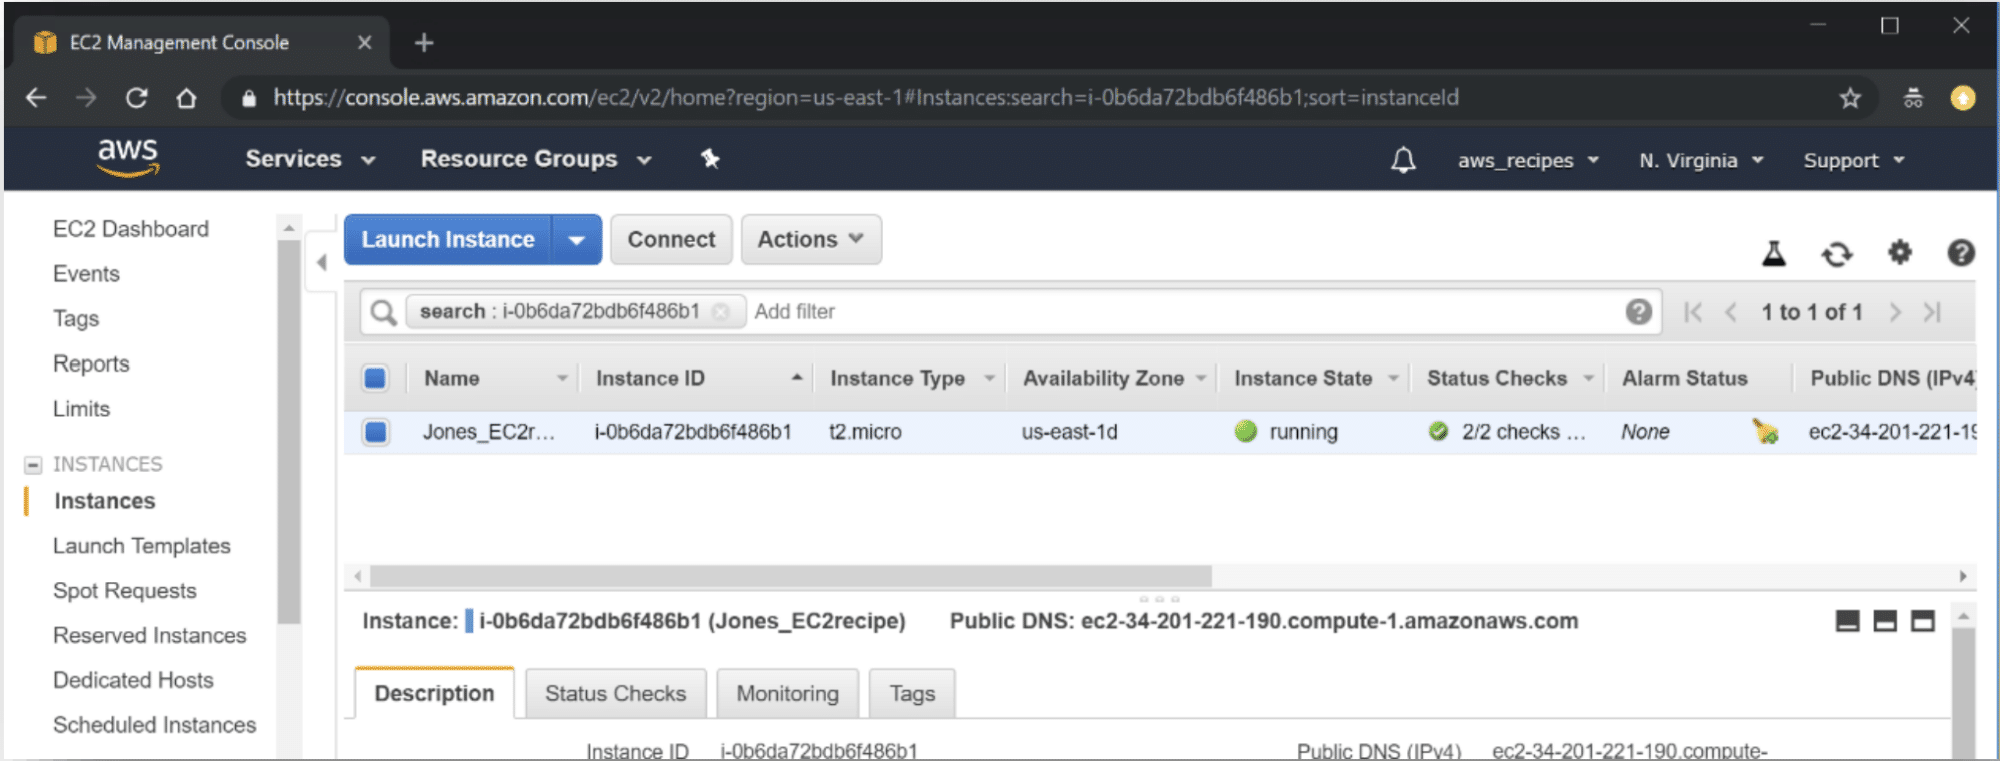
- If necessary, after the private key file has been downloaded, check the box in front of “I acknowledge that I have access to the selected private key file…” and then click Launch Instances.
- The pop-up window that appears next allows you to create a key pair — “public” and “private” keys — that will be used for securely connecting to your instance from your computer. The public key will be a part of your EC2 instance configuration and the private key will be kept on your local PC or Mac.
Stopping or Terminating an EC2 Instance
- After you are finished processing with your EC2 Instance and no longer need it running, make sure to Stop or Terminate it. If you do not do this, you will continue to incur charges on your account!
- Open the AWS Management Console by clicking on the AWS logo in the upper left.
- To open the EC2 Dashboard, type “EC2” in the Find services search box and Enter. Or click on EC2 under Recently visited services.
- In the EC2 Dashboard, under Resources, click on Running Instances to open the Instances status console.
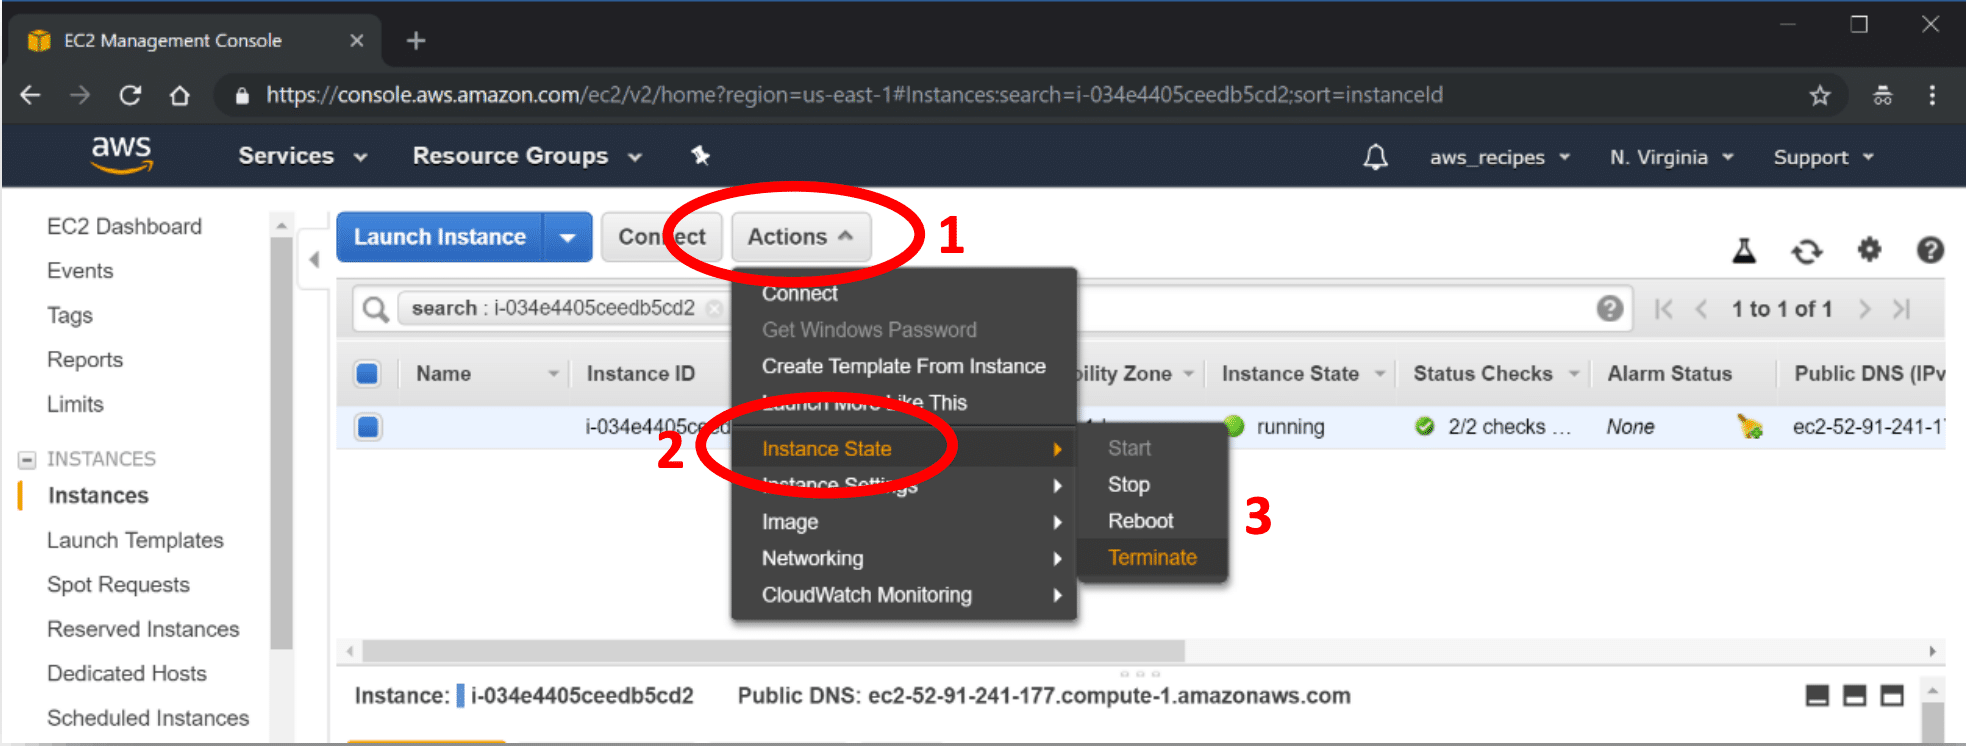
- Select your instance by clicking on the box in front of the Instance ID.
- Click on Actions (1), then Instance State (2), then select Stop (if you want to restart your instance later) or Terminate (3).


