
Background
A Billing Alarm will notify you by email when your AWS account charges for the month have exceeded a monetary amount you have set. This is an extremely useful tool to stay on-budget. It can also be a way to let you know if you have forgotten to stop or terminate an AWS service — such as an EC2 instance — and help avoid unexpected charges.
Prerequisites
You must have an AWS account. If you don’t have an account, create one now.
Note: You will need to provide credit card information for your new account.
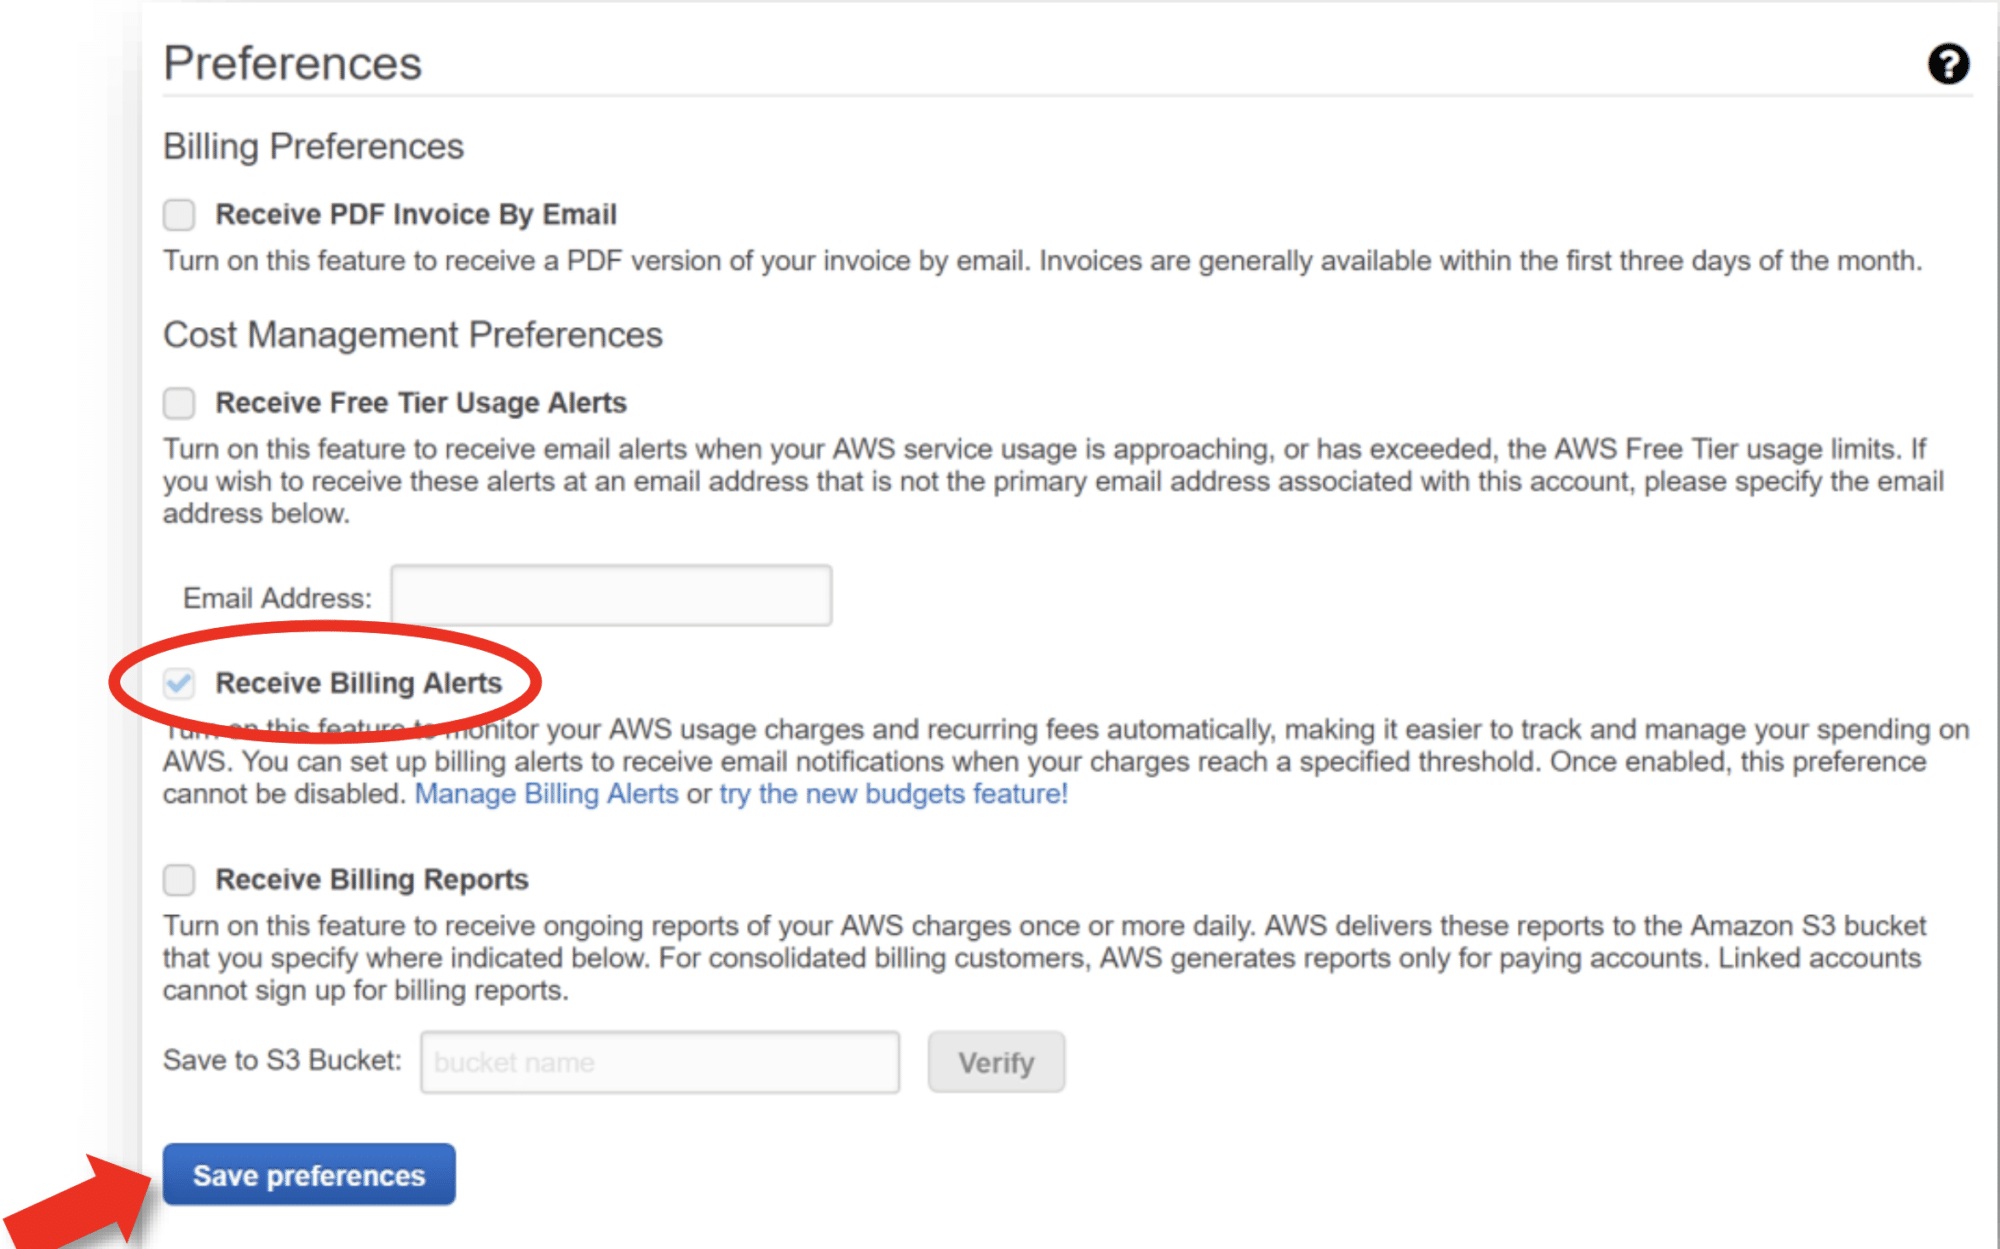
Enable Billing Alerts for Your Account
Note: Billing Alerts must be enabled on your account before you can create a Billing Alarm.
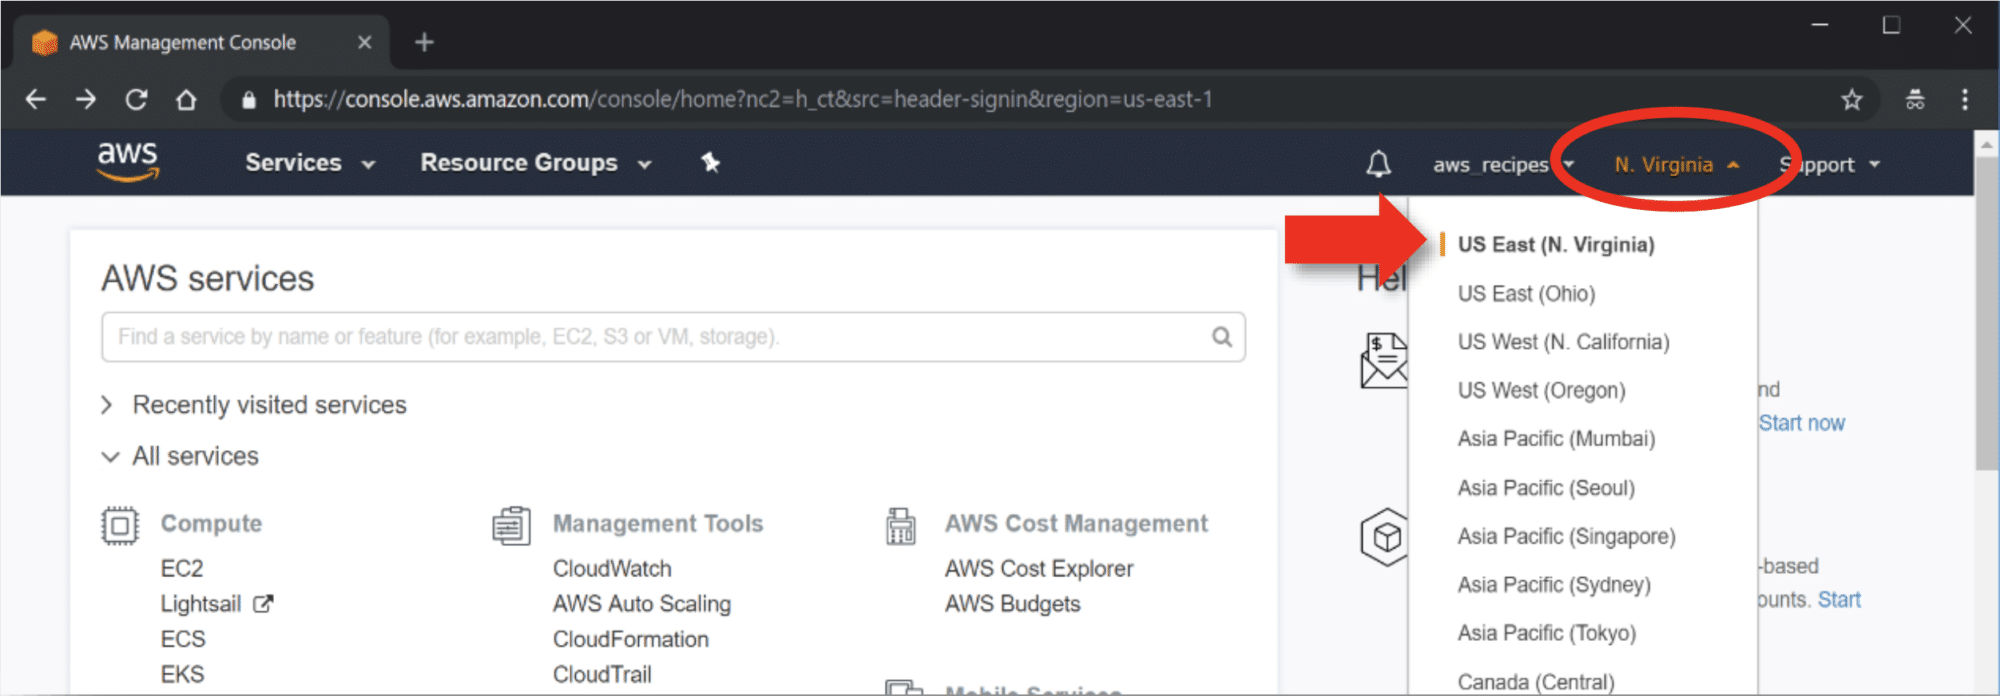
- Sign in to your AWS account.
- Make sure the region is set to U.S. East (N. Virginia). This is the region where AWS stores billing information.
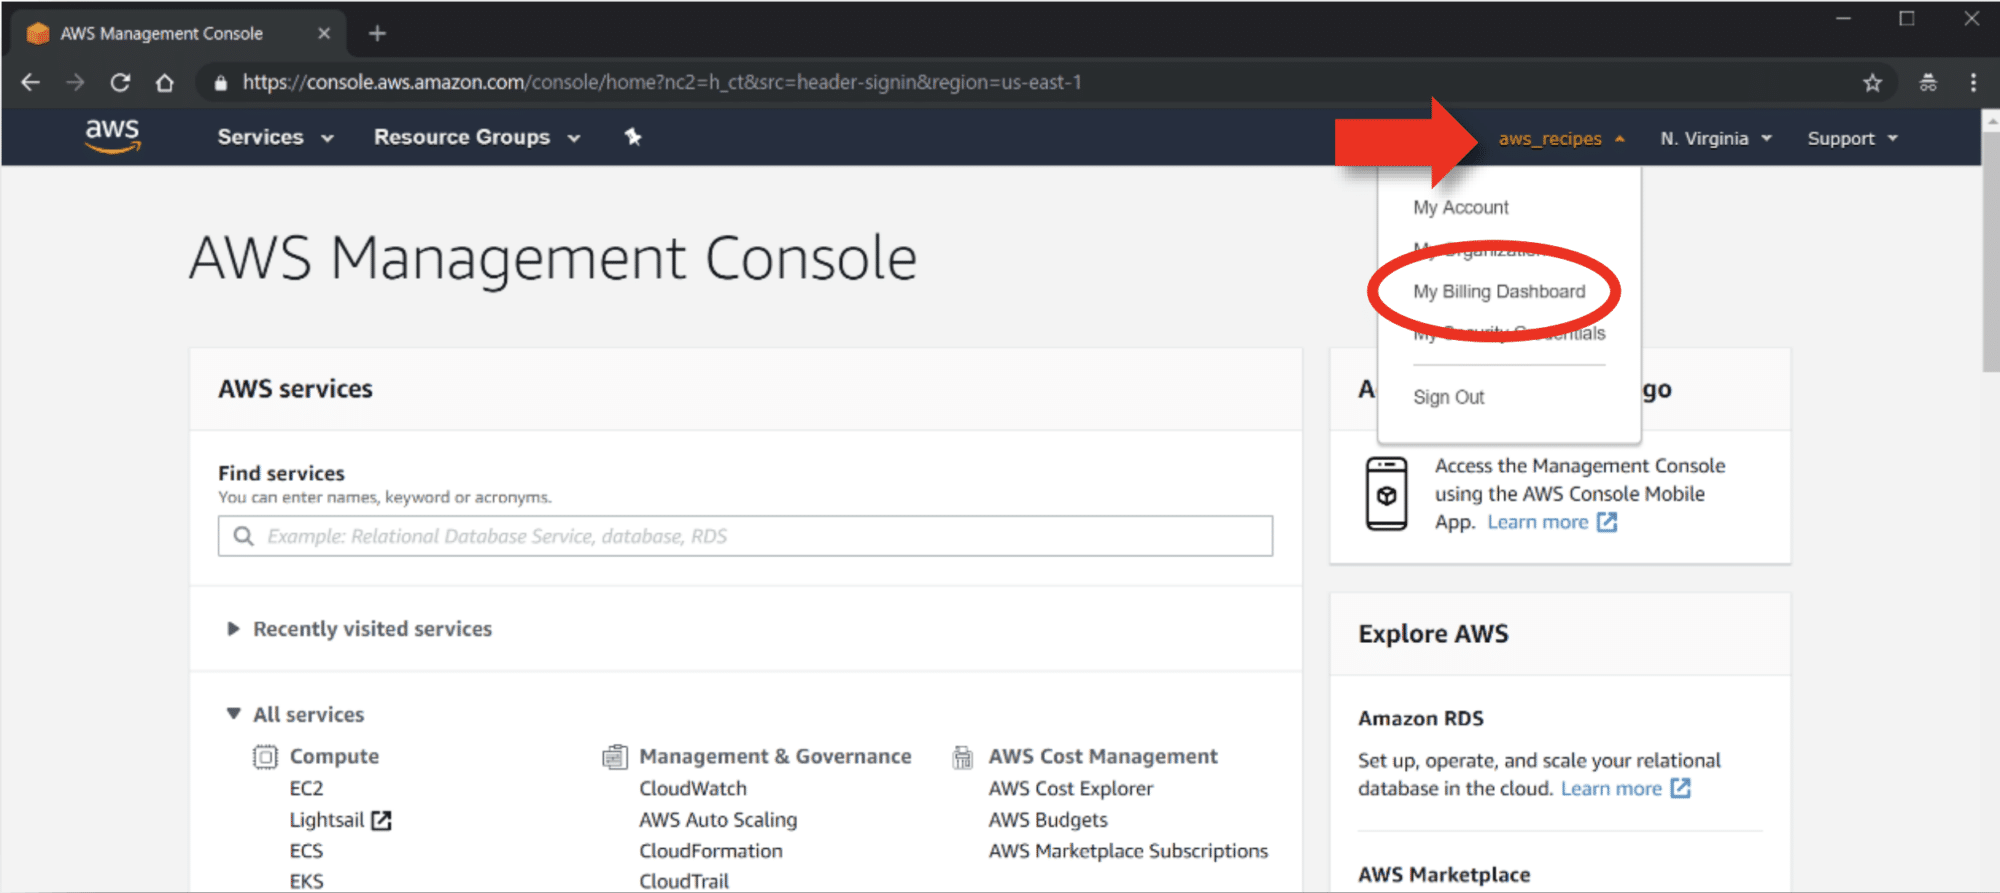
- Click on your account name in the upper-right corner.
- In the dropdown menu, select My Billing Dashboard to open the Billing & Cost Management Dashboard.
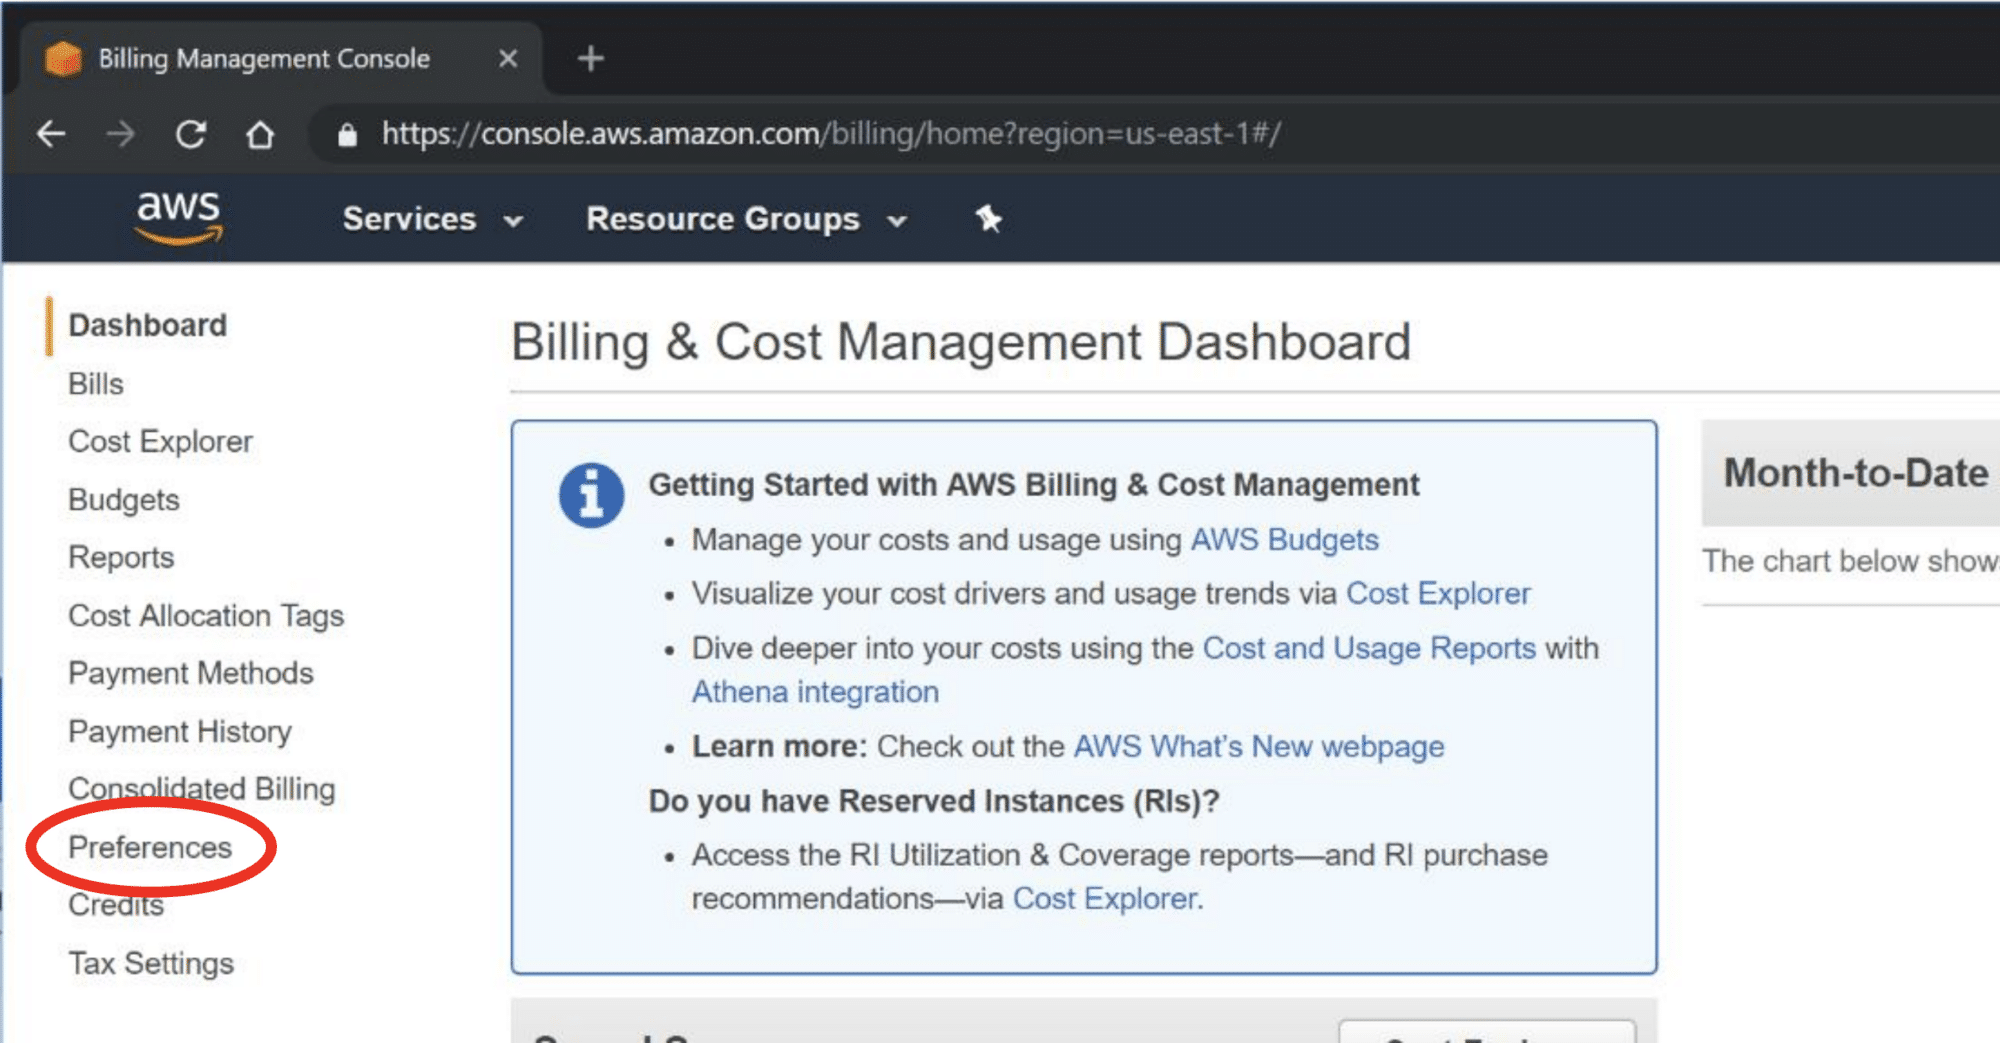
- In the left Dashboard menu, click on Preferences.
- Check the box in front of Receive Billing Alerts and then click Save Preferences.
- Sign in to your AWS account.
Note: If you are eligible, make sure the Receive Free Tier Usage Alerts box is checked as well.
Create a Billing Alarm using the CloudWatch Console
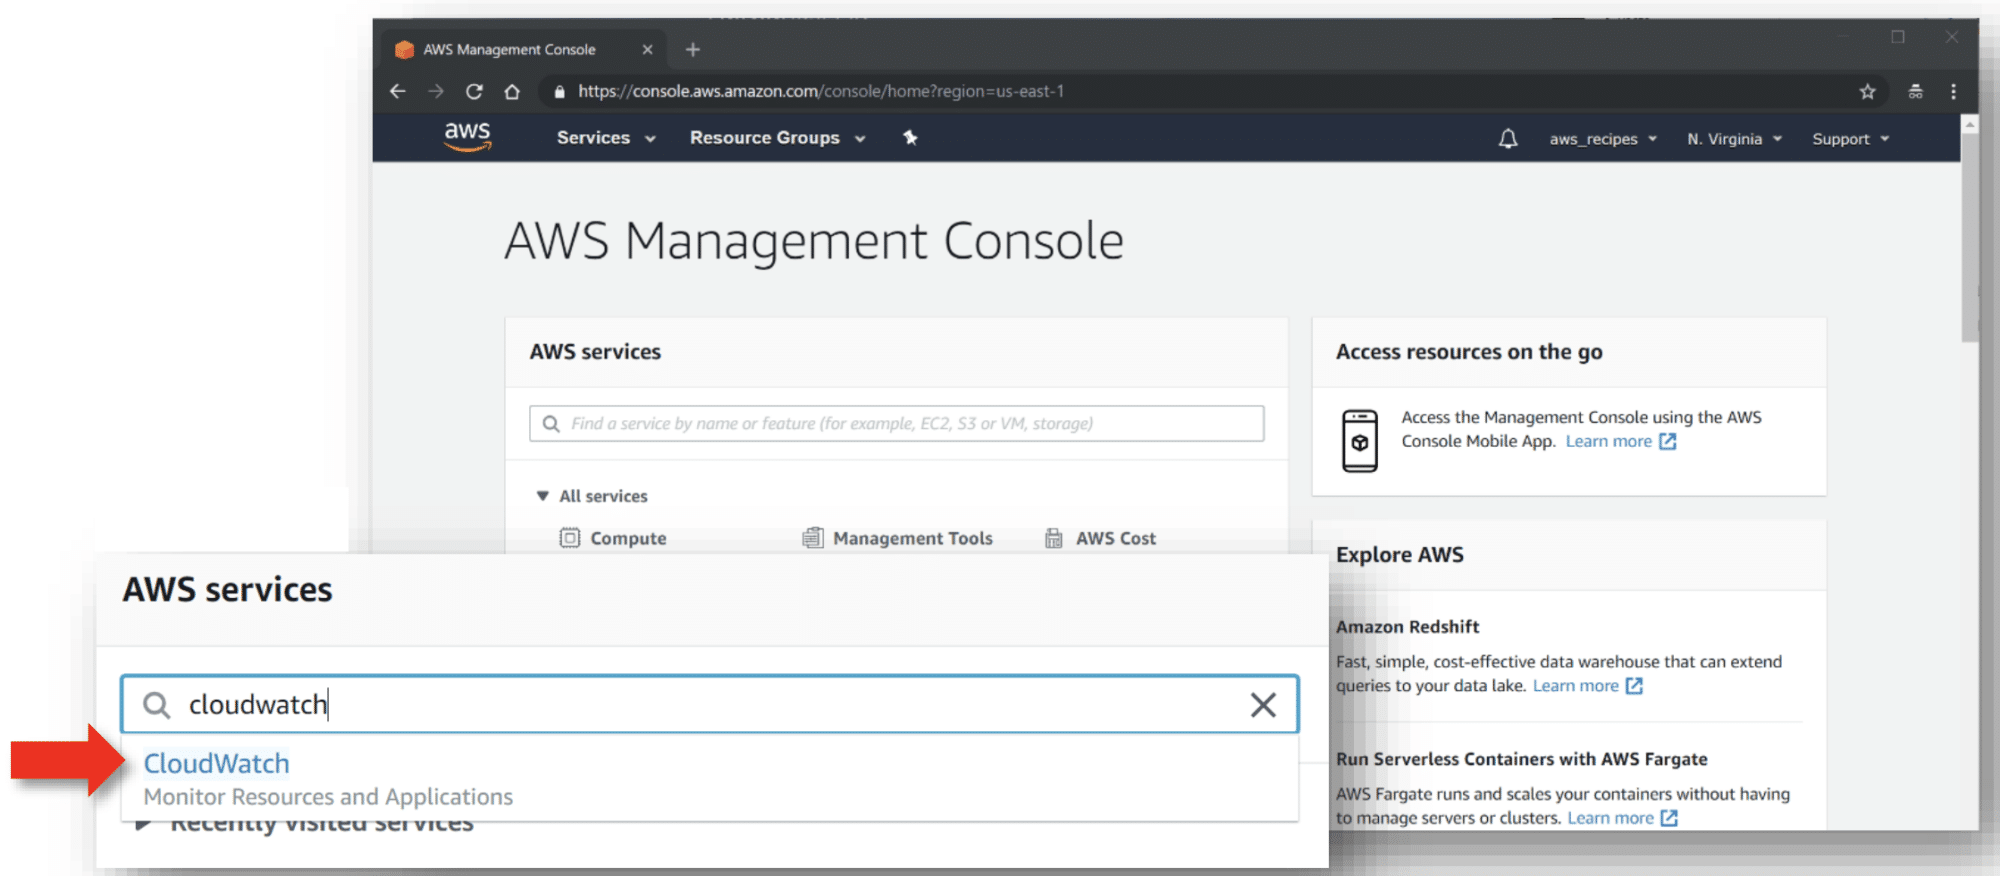
- Click on the AWS logo in the upper left of the Billing & Cost Management Dashboard screen to open the AWS Management Console.
- Type “cloudwatch” in the AWS Management Console search box and then click on CloudWatch.
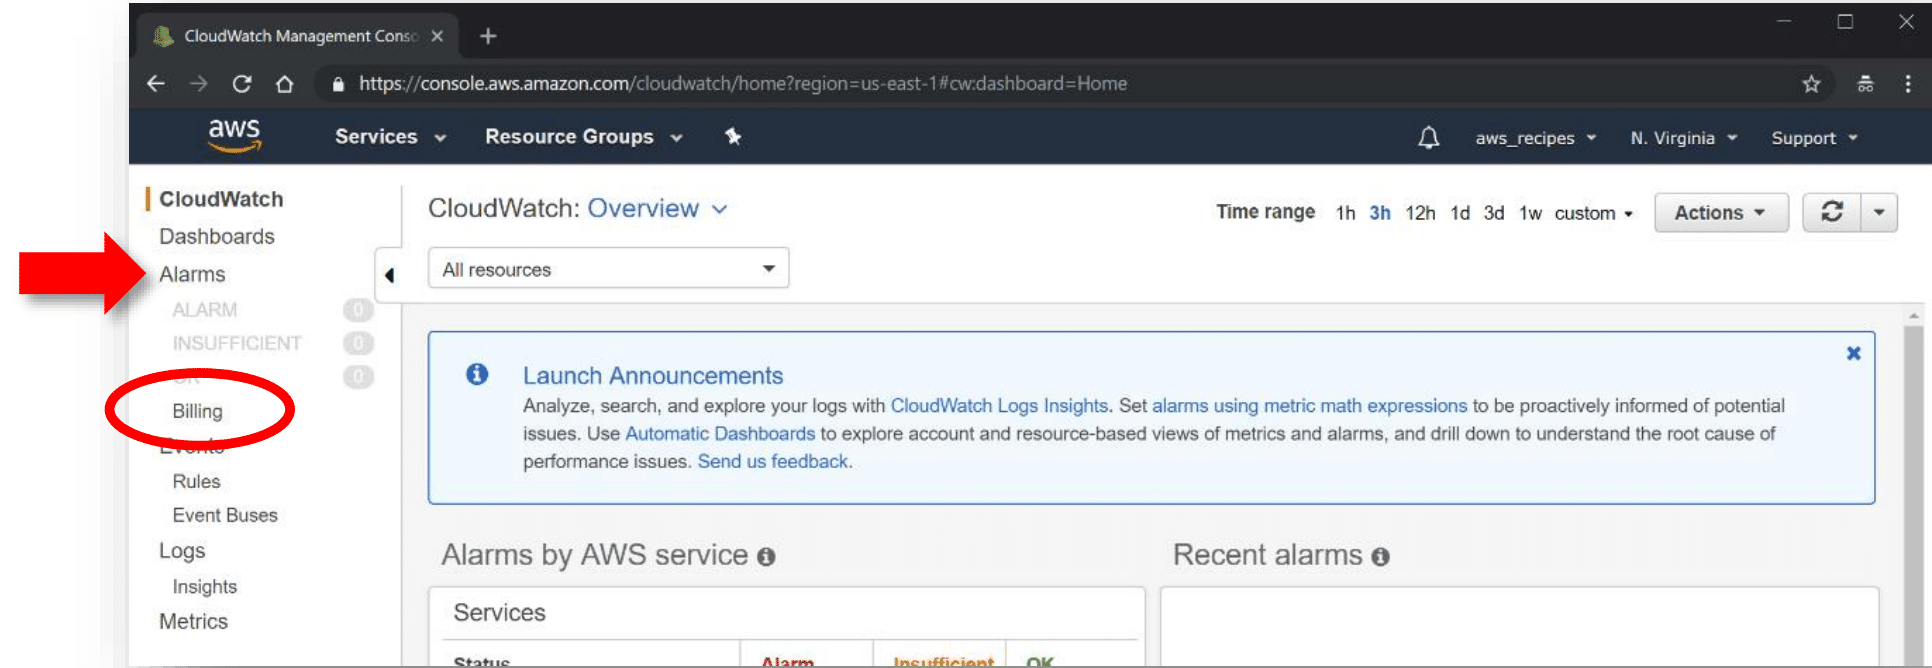
- In the CloudWatch console menu on the left under Alarms, click on Billing.
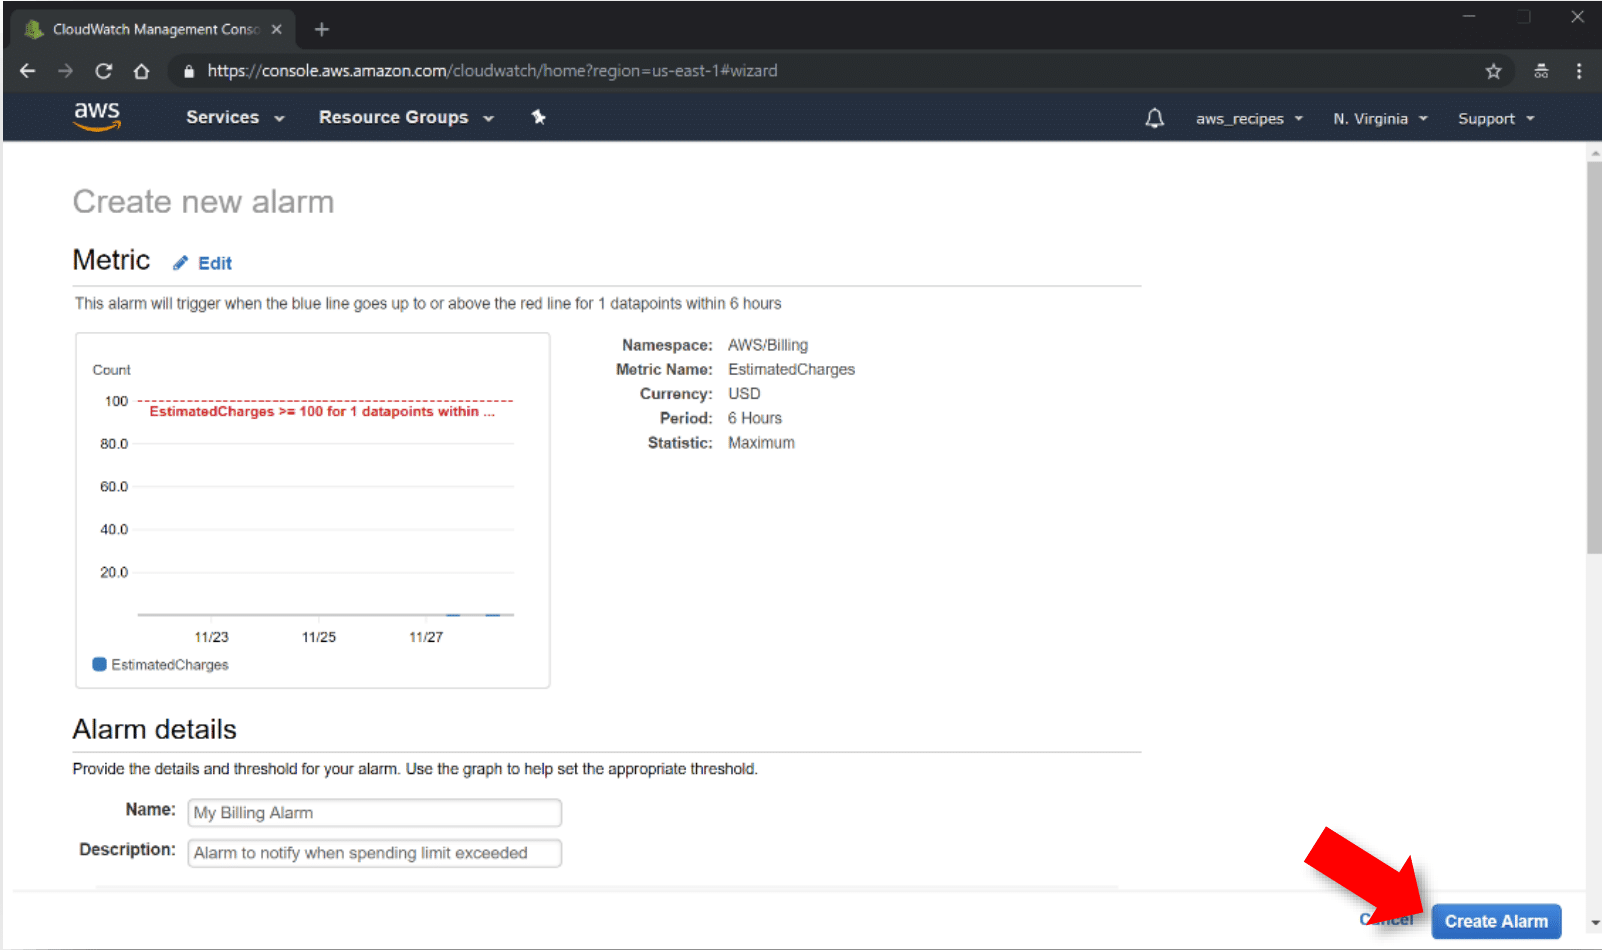
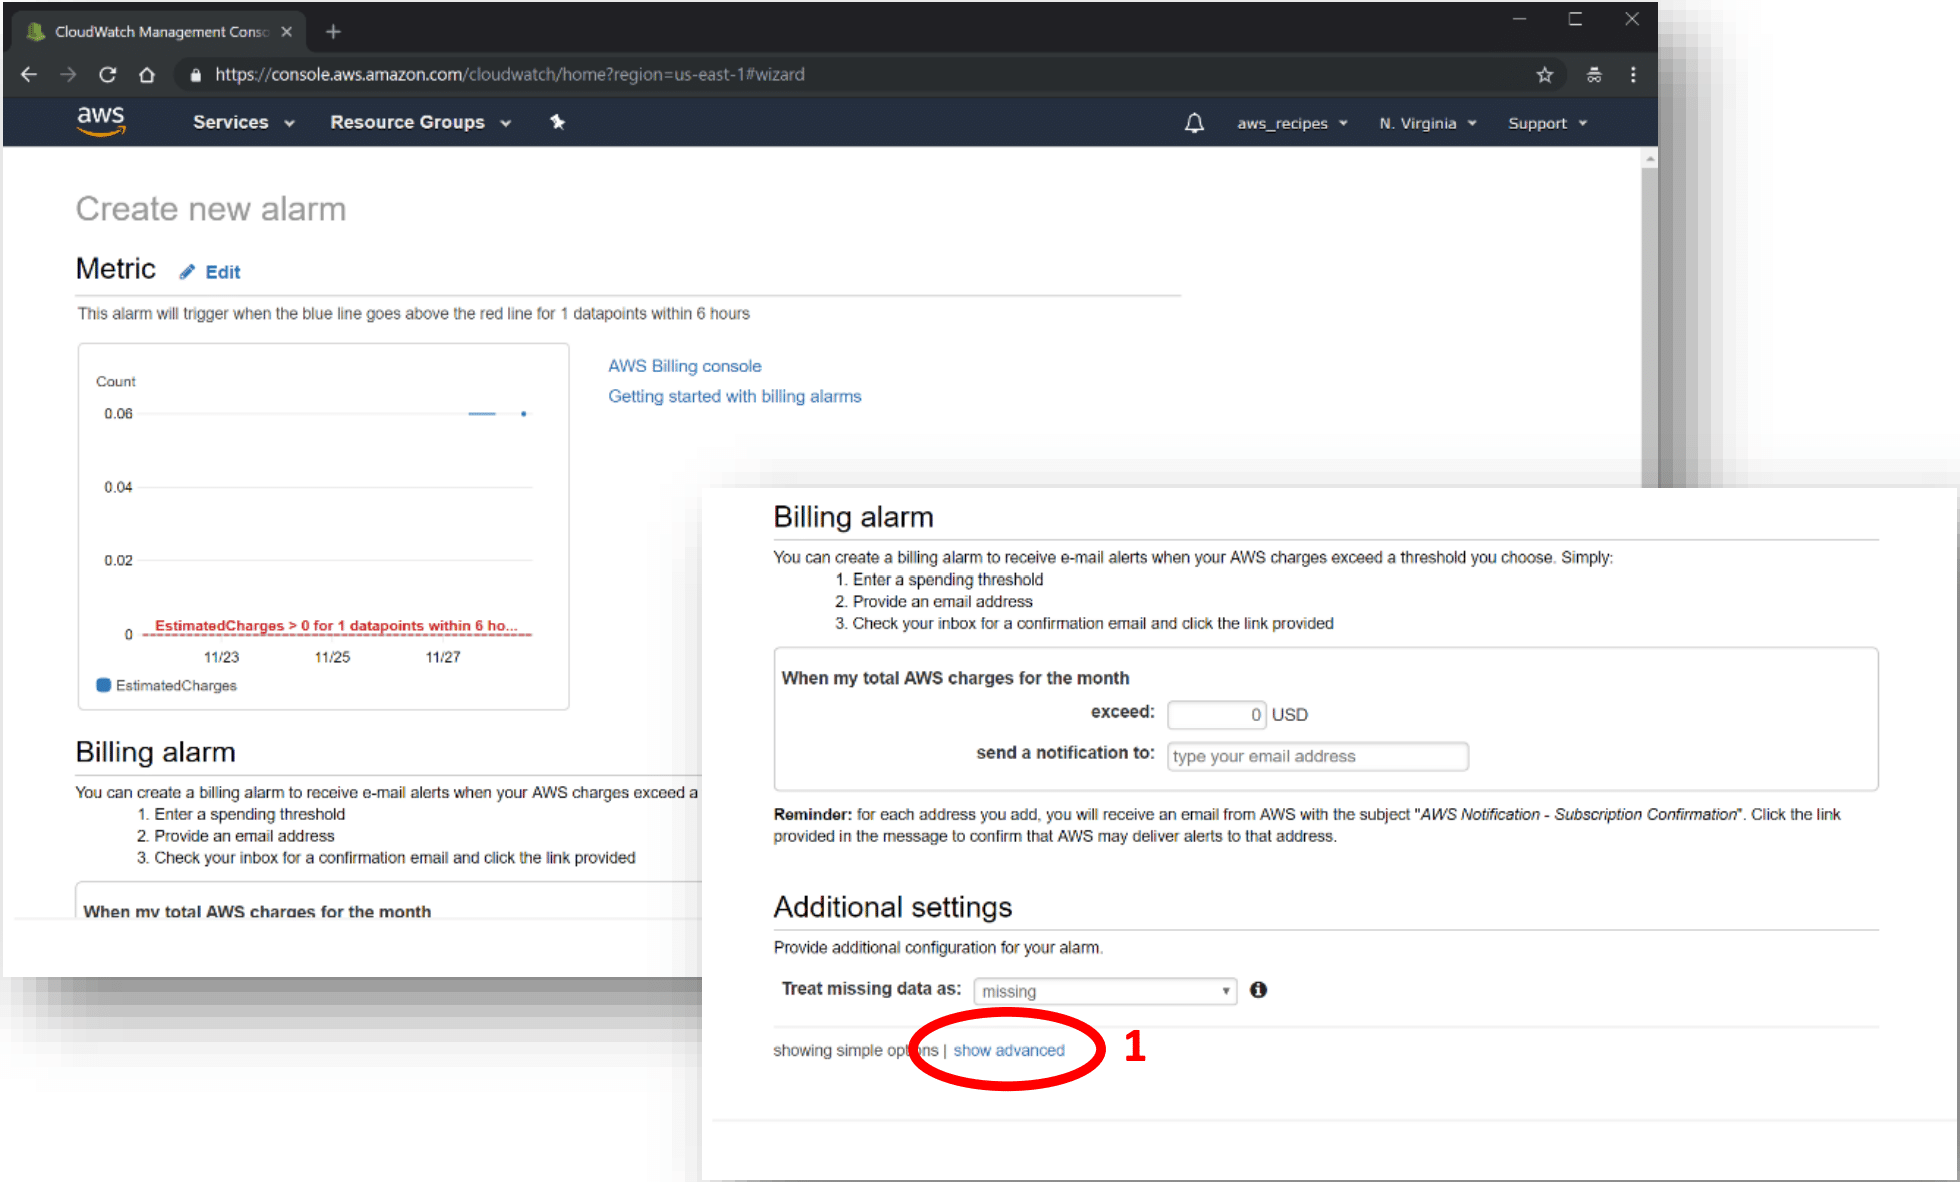
- In the Billing Alarms window, click the Create Alarm button.
- Scroll to the bottom of the Create new alarm page and click on show advanced (1).
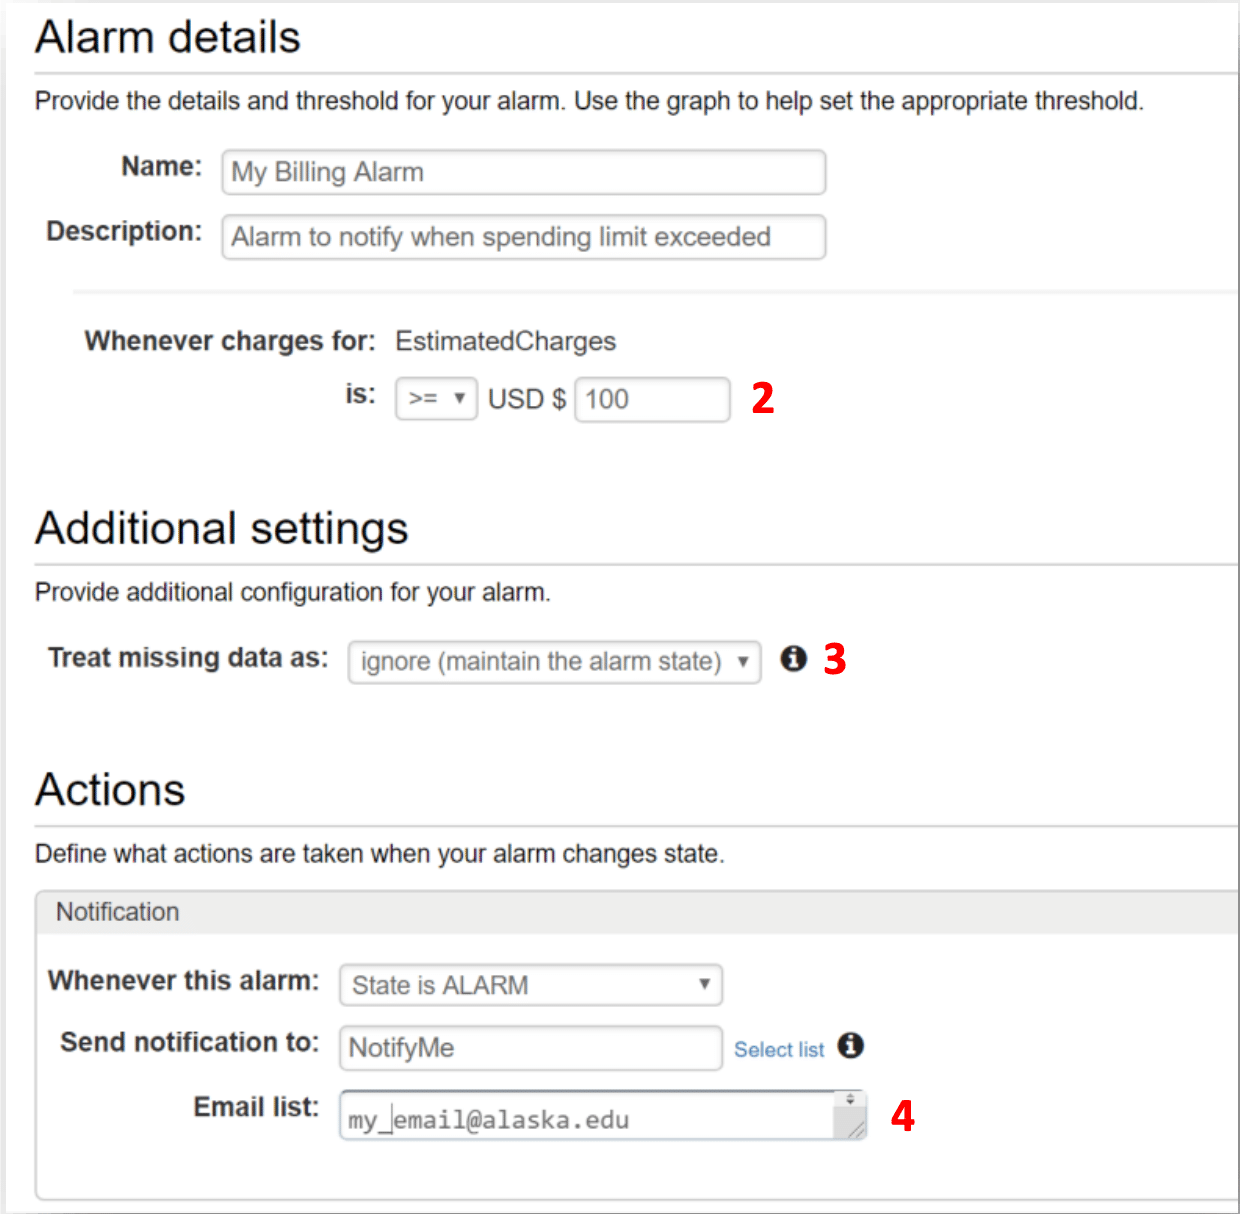
- Alarm details
- Add a Name for your new alarm and a Description (optional).
- Under Whenever charges for: set is: to >= and USD $ to the amount in dollars you want to set as a limit (2).
Note: You will receive an email notification when your account charges have reached or exceeded this amount.
- Additional settings
- Under Treat missing data as: choose ignore (maintain the alarm state) (3).
- Actions
- Under Email list: enter your email address (4).
- Leave the other settings unchanged.
- Click on the Create Alarm button at the bottom of the Create new alarm page.
- Additional settings
Important: You will be sent an email to confirm the email address set in your alarm. Open the email and click on the “Confirm subscription” link to enable notifications.

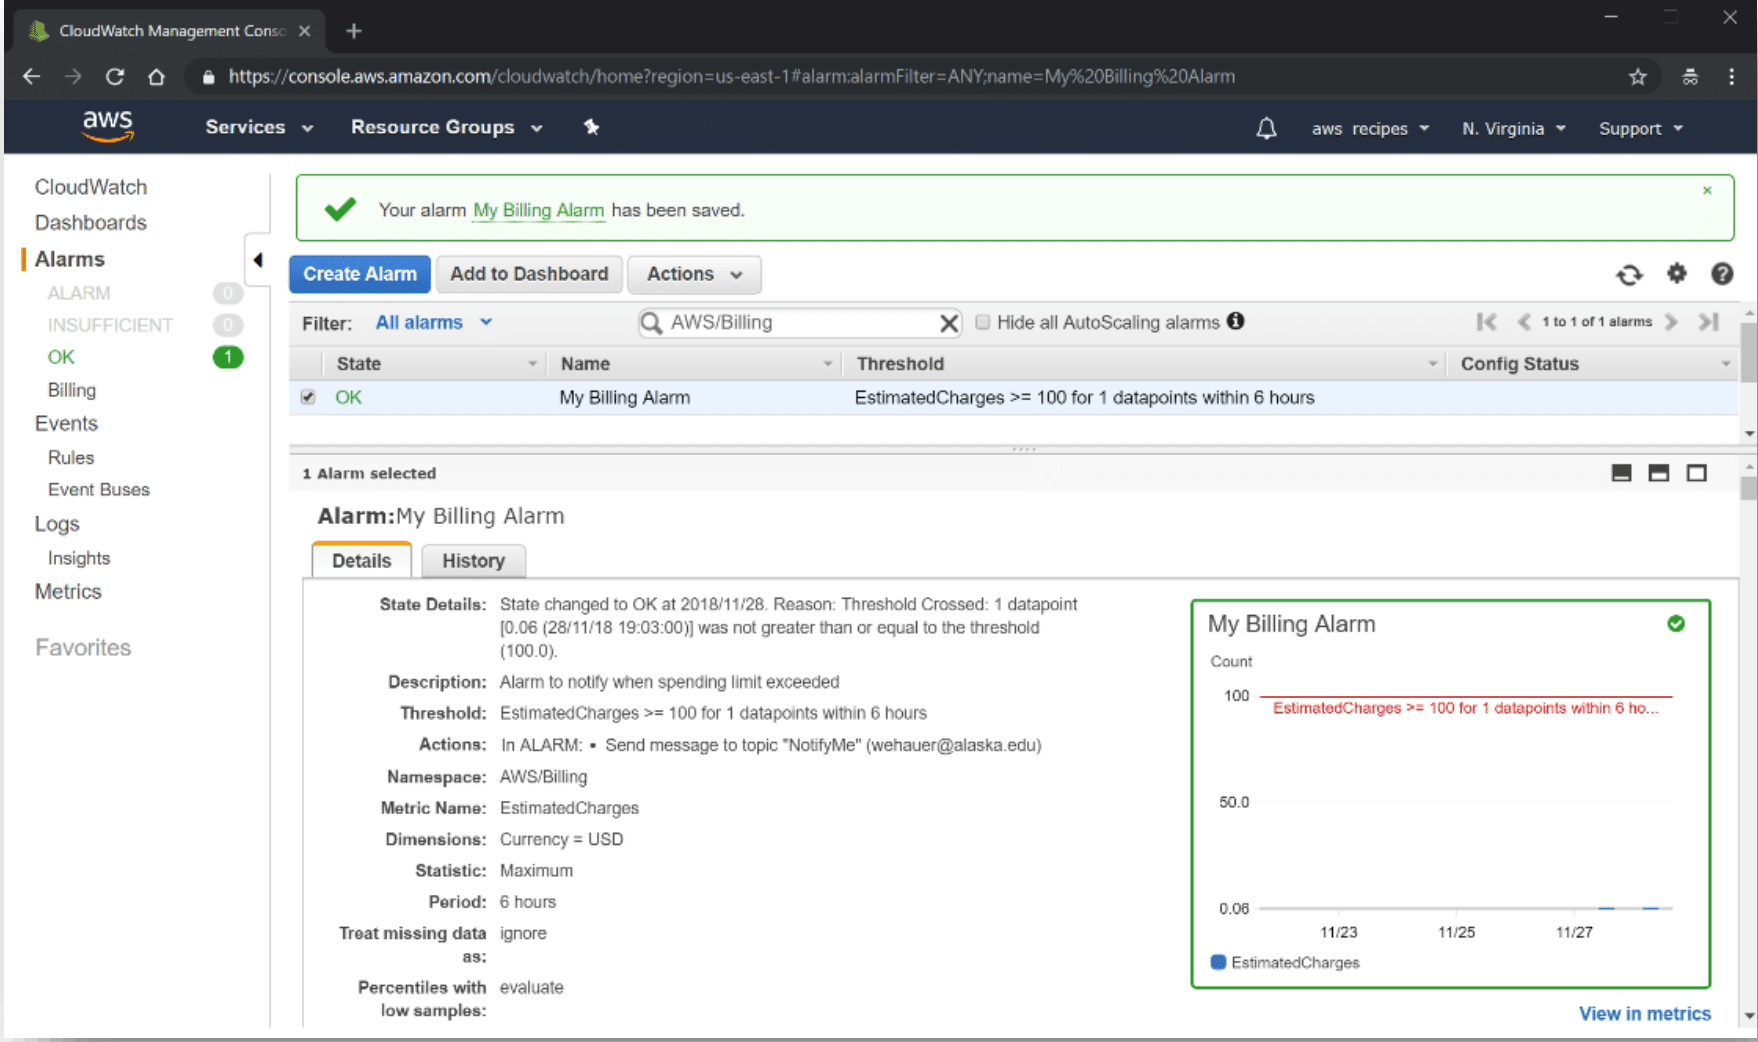
Monitor a Billing Alarm status
- When you create a new alarm, an alarm status window will open. The State will initially show INSUFFICIENT_DATA but will update to OK in a minute or so.
Note: If the State shows PENDING_CONFIRMATION, open the confirmation email that was mailed to you and click on “Confirm subscription.”
- To see details of your alarm, check the box in front of the alarm description.
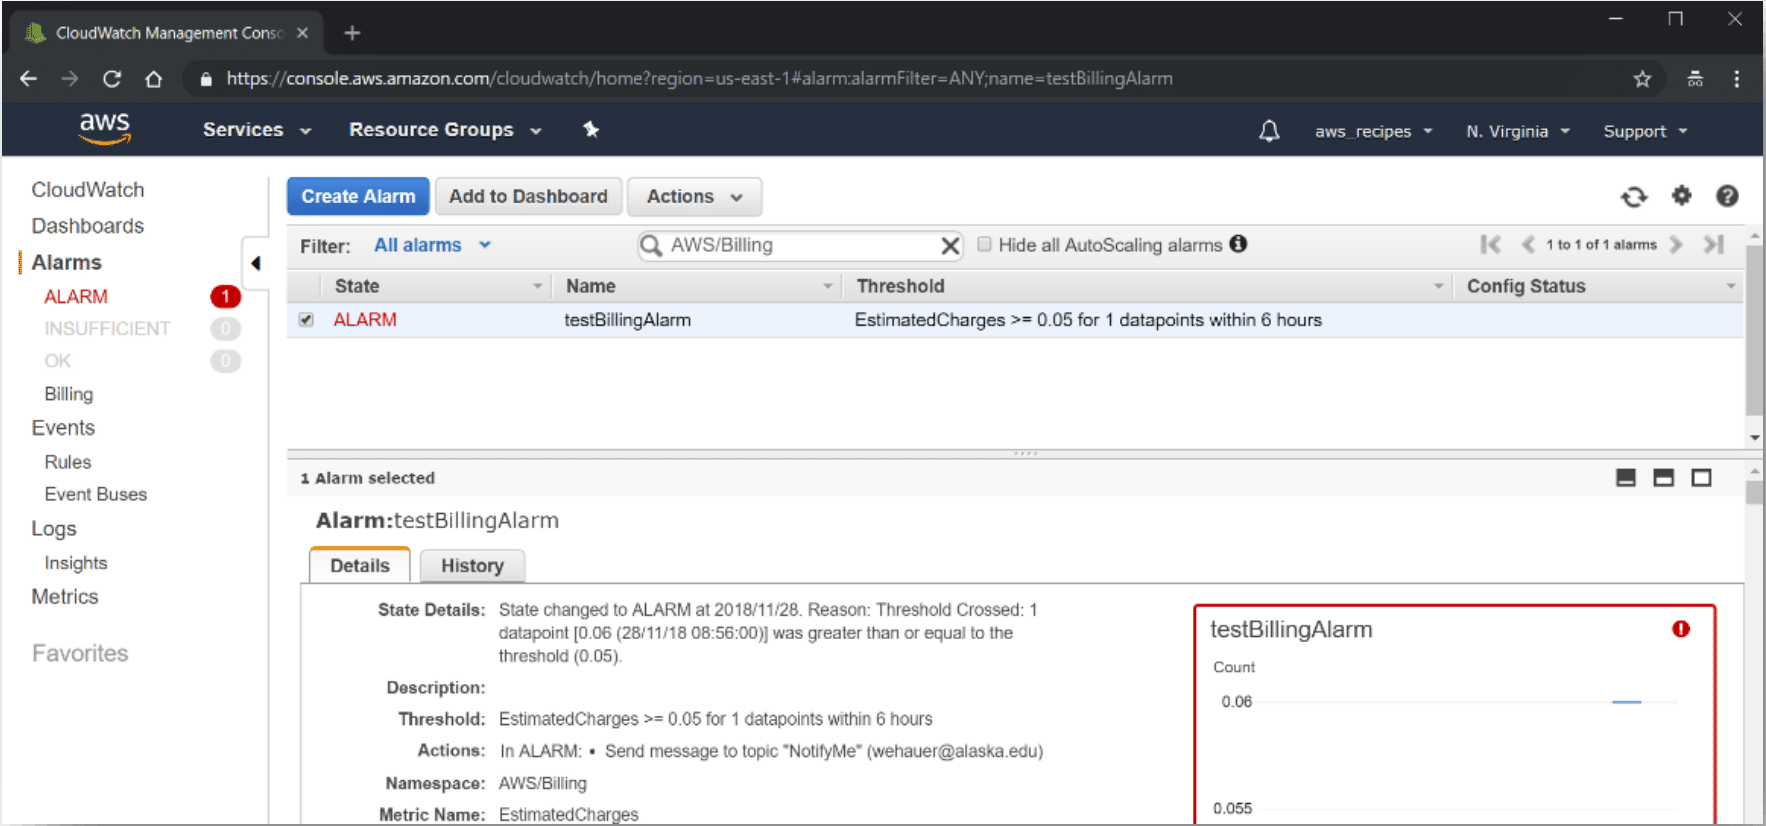
- When the monetary limit set for your alarm has been exceeded, the State will change to ALARM, the graph border will be red, and an email will be sent to you notifying you of this.
- You can check the status of an alarm at any time by opening the CloudWatch console.
- Make sure the region is set to U.S. East (N. Virginia).
- In the left menu, under Alarms, click Billing, then check the box in front of an alarm to see its details.
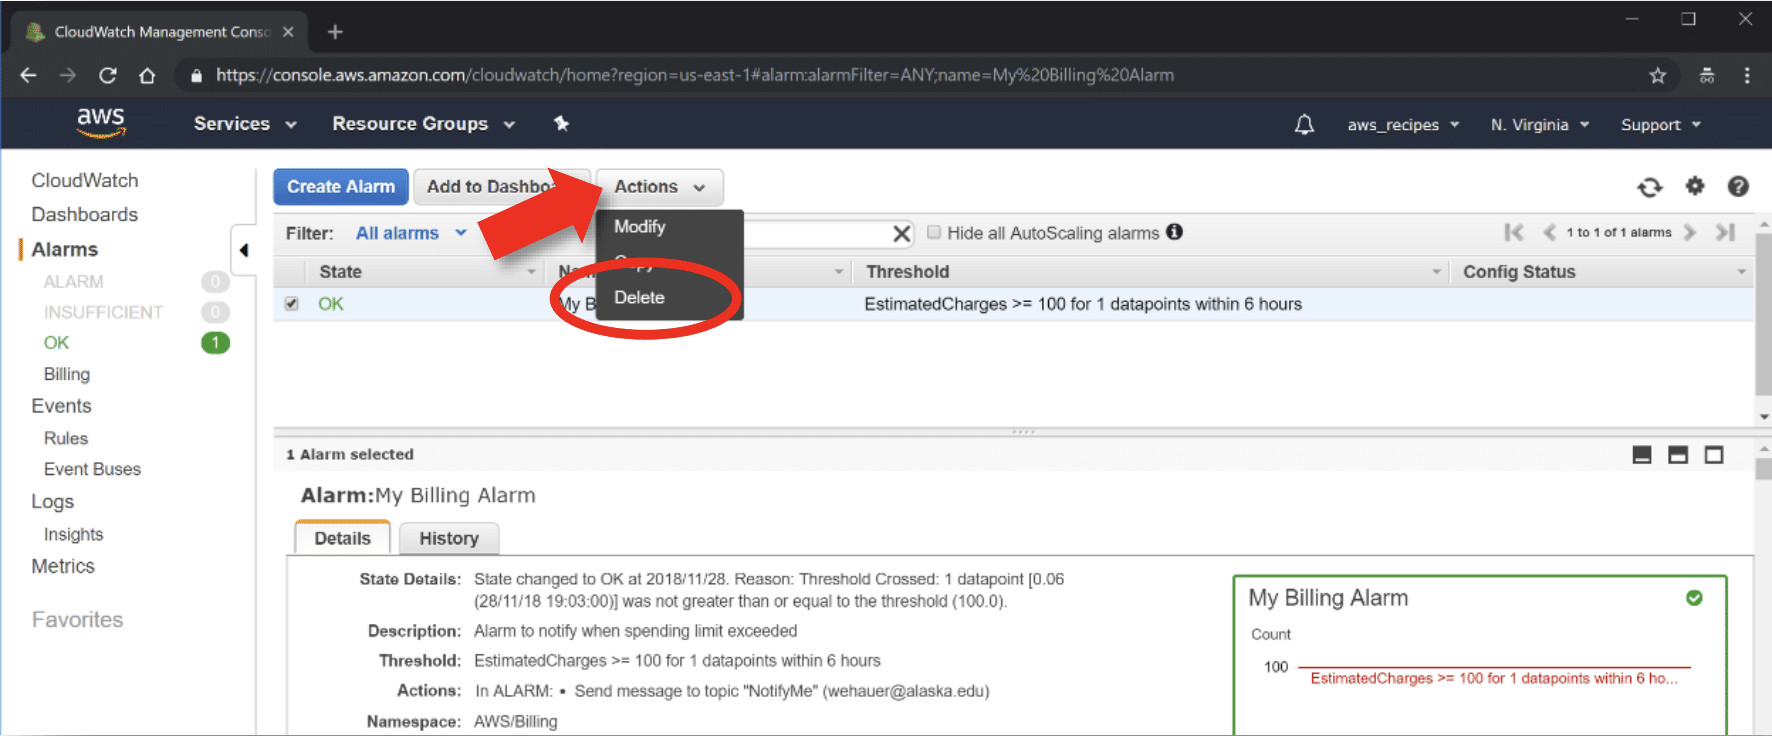
Delete a Billing Alarm
- Open the CloudWatch console.
- Make sure the region is set to U.S. East (N. Virginia).
- In the left menu, under Alarms, click Billing, then check the box in front of an alarm to see its details.
- At the top, click on the Action tab and select Delete.
- When prompted, confirm “Yes, Delete.”
- Open the CloudWatch console.
Note: To make changes to the settings for your alarm — e.g., set a new billing threshold — select Modify under the Actions tab.