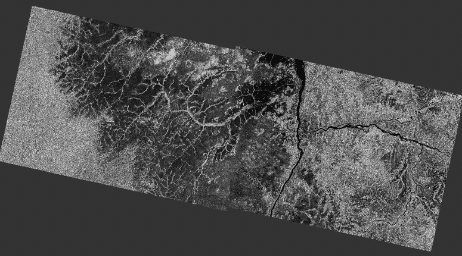
Mosaic of two Sentinel-1 products in separate paths. Credit: Copernicus Sentinel data 2018, processed by ESA.
Background
This recipe will go over the steps to create a mosaic of two GRD products in different swaths. Rather than taking individual images of each area, the Sentinel-1 satellites intake large swaths or paths of data as they orbit the Earth. In order to facilitate the use of Sentinel-1 products and avoid unruly image sizes, the swaths of data are divided into more manageable Alaska Satellite Facility framed slices. Because of the manner in which the Sentinel-1 satellites acquire images, creating a mosaic of these products in the horizontal direction requires a different set of steps than in the vertical direction. For steps on how to create a mosaic of products located in the same path, see Alaska Satellite Facility’s swath mosaic recipe.
On the boundary of two paths or adjacent frames, there is considerable overlap and the lateral edges of the products may also have a significant amount of border noise. This will have to be eliminated before the frames themselves can be combined. The mosaicking of multiple swaths relies on resampling of the overlap area, patching them together. Because the mosaic process for horizontally aligned products results in a rough amalgamate of the two or more swaths, the resultant image is no longer a product that can be processed normally. However, some operations like speckle filtering will still work. This same procedure can be applied for assembled swaths, like the product created in Alaska Satellite Facility’s swath mosaic recipe.
Prerequisites
Materials List
- Sentinel-1 Toolbox (version 6.0.3 was used in this recipe)
- Set of Sentinel-1 IW Ground Range Detected (GRD) products. Download the sample granules below or use Vertex to download your own GRD products.
System Requirements
- Windows, Mac OS X, Unix
- 32GB RAM
- Enough hard disk space to store processed data (approximately 50 GB)
Note: A Solid State Drive will perform significantly faster than a Hard Disk Drive; when processing large files this will be very advantageous. In addition, if you encounter an error in the middle of a processing step, it may be because your disk is full.
Preliminary Pre-Processing
Open the Products in Sentinel-1 Toolbox
- Open the Sentinel-1 Toolbox.
- Use the Open Product button in the top toolbar and browse to the location of the downloaded GRD products.
- Press and hold the Ctrl button (Command key for Mac OS X) to select the .zip files and press Open.
Note: Do not extract the files, if you did unzip the files, select the manifest.safe file from each Sentinel-1 product folder.
View the Products
- In the Products Explorer, you will see the opened products.
- Double-click on a product to expand it.
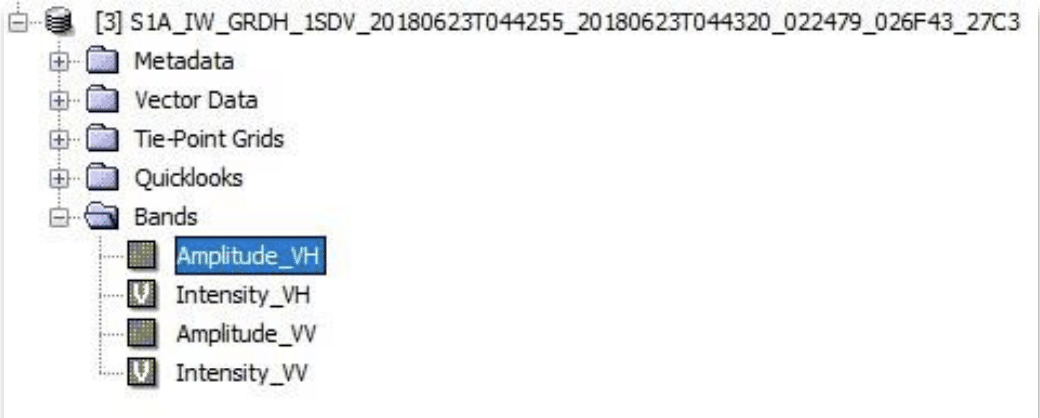
- Expand the Bands folder and you will find two bands for each polarization: an amplitude band, which is actually the product, and a virtual intensity band, which is there to assist you in working with the GRD data.
- To view the data, double-click on Amplitude_VH band.
- Zoom in using the mouse wheel and pan by clicking and dragging the left mouse button.


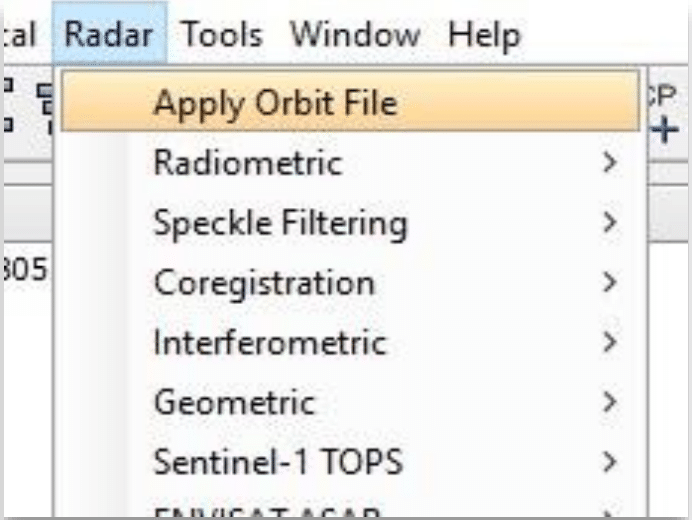
Apply the Orbit File
- Select the first GRD product in the Product Explorer.
- From the top menu navigate to Radar > Apply Orbit File.
- In the Apply-Orbit-File window, specify the target product name and output folder. The products will automatically be appended with the suffix _Orb if you choose the default name. Keep BEAM-DMAP as the output format.
- Click on the Processing Parameters tab. If your product is less than 20 days old, a precise orbit file may not be available yet. You can either select Sentinel Restituded in the Orbit State Vectors dropdown, or if you are unsure whether the file has been updated yet, you can check the Do not fail box. Leave the Polynomial Degree as 3.
- Click Run and allow the process to finish.
- To conserve memory and stay organized, close the original GRD. To do this, select the GRD product in the Product Explorer and navigate to File > Close Product.
- Repeat steps 1-5 for the second GRD. You should now have two _Orb products listed in the Product Explorer.


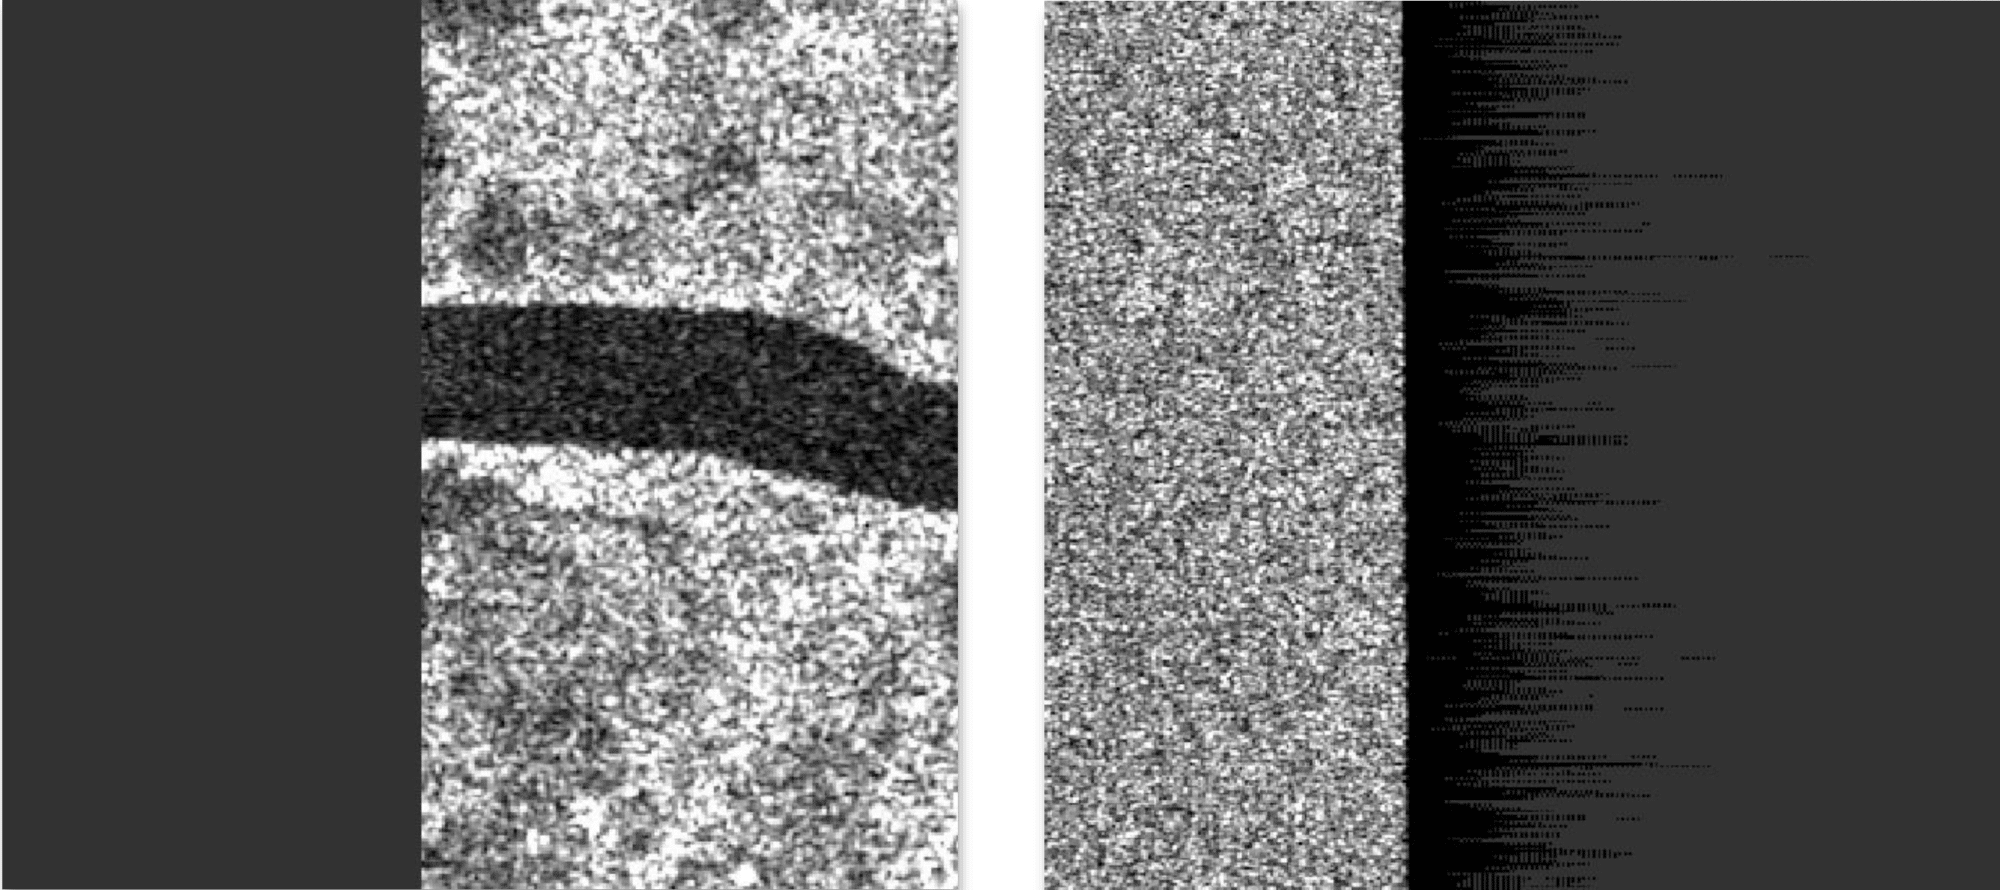
Check for Border Noise (Product Dependent)
Zoom in on the lateral edges of each of your products. Border noise will appear as a black edge that is discontinuous with the rest of the backscatter. It may also look like the edge of a rough carpet. Any border-noise will interfere with the resampling in the mosaicking process and result in erroneous backscatter values for the overlap sections. If the products contain border noise, proceed with the rest of this step in order to remove the anomaly. In this case, you will need to estimate the extent of the noise. You can do this by using the X and Y pixel values in the bottom left corner of the Sentinel-1 Toolbox window to approximate the width. If no border noise is present, this step can be skipped. The products in this recipe exhibit no Border Noise. Therefore, in this case, this step is unnecessary and you can proceed to the next section.
- Select the first _Orb product.
- Click Radar > Sentinel-1 TOPS > S-1 Remove GRD Border Noise.
- In the S-1 Remove GRD Border Noise window, specify the output folder and the target product name. The products will automatically be appended with the suffix _Brd if you choose the default name.
- In the Processing Parameters tab, set the Border margin limit to an appropriate pixel number that will encompass the entire extent of the noise. You can also set it to a reasonably large number such as 1000 to be sure it will be removed.
- Click Run and allow the image to process.
- Navigate to the newly created product in the Product Explorer and view one of the bands. Check the left and right sides of the image to ensure that the fringes on the borders have been removed. If they are still visible, return to step 3 and repeat the process with a larger Border margin limit value.
- Repeat steps 3-6 for each product.
Steps to Generate a Mosaic
Note: After this step is complete, you will not be able to perform most SAR operations on your resultant image. If you need to perform any other processes, they should be done to the individual products rather than the mosaic.
SAR Mosaic Wizard
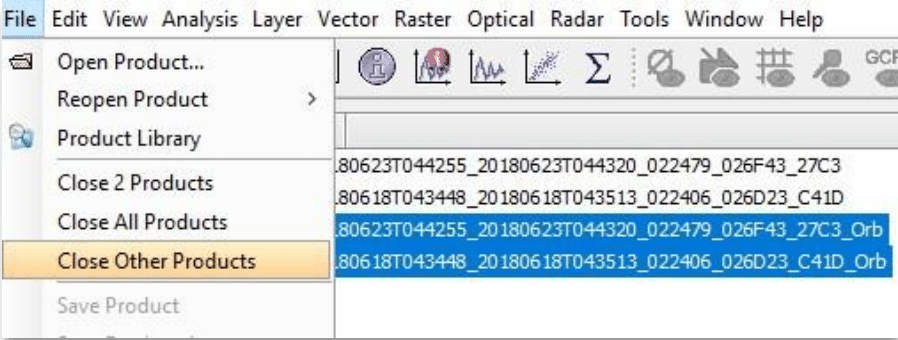
- In the Product Explorer, Ctrl-click (Command-click for Mac OS X) each of the last produced products in the previous step. If you removed border noise, select the _Bdr products. If not, select the _Orb products. Keep the output format as BEAM-DIMAP.
- Navigate to File > Close Other Products.
- From the top toolbar, navigate to Radar > SAR Wizards > SAR Mosaic Wizard. A corresponding window will open outlining the process. When going through each stage of this procedure, be sure not to close this window. Red text will show up after each sub-step, indicating a finished process, but only at the very end should you exit the SAR Mosaic Wizard window. Otherwise, you will have to start from the beginning.
- Click Next.
- In the SAR Mosaic Wizard: Step 1 Input window, click on the Add Opened button, the icon consisting of a plus sign in front of a rectangular window. This will add both of the swaths to the list. Keep the other parameters as the defaults.
- Specify the output folder
- Click Next.
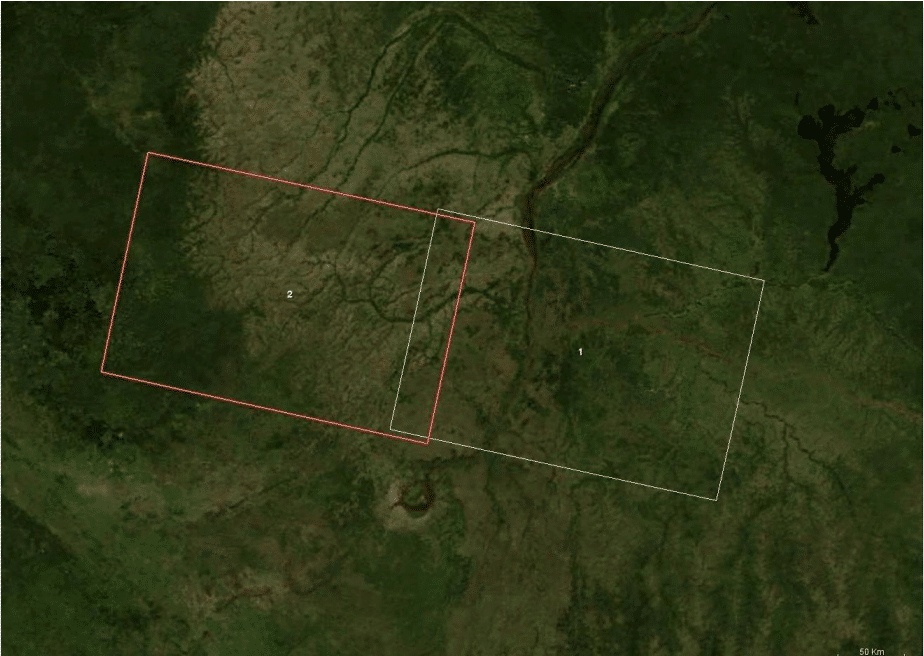
- In the SAR Mosaic Wizard: Step 2 Viewing the footprint window, you can view the footprint of your products. Zoom in to the location of your products by using the mouse wheel. To move the view, right-click and hold while dragging.
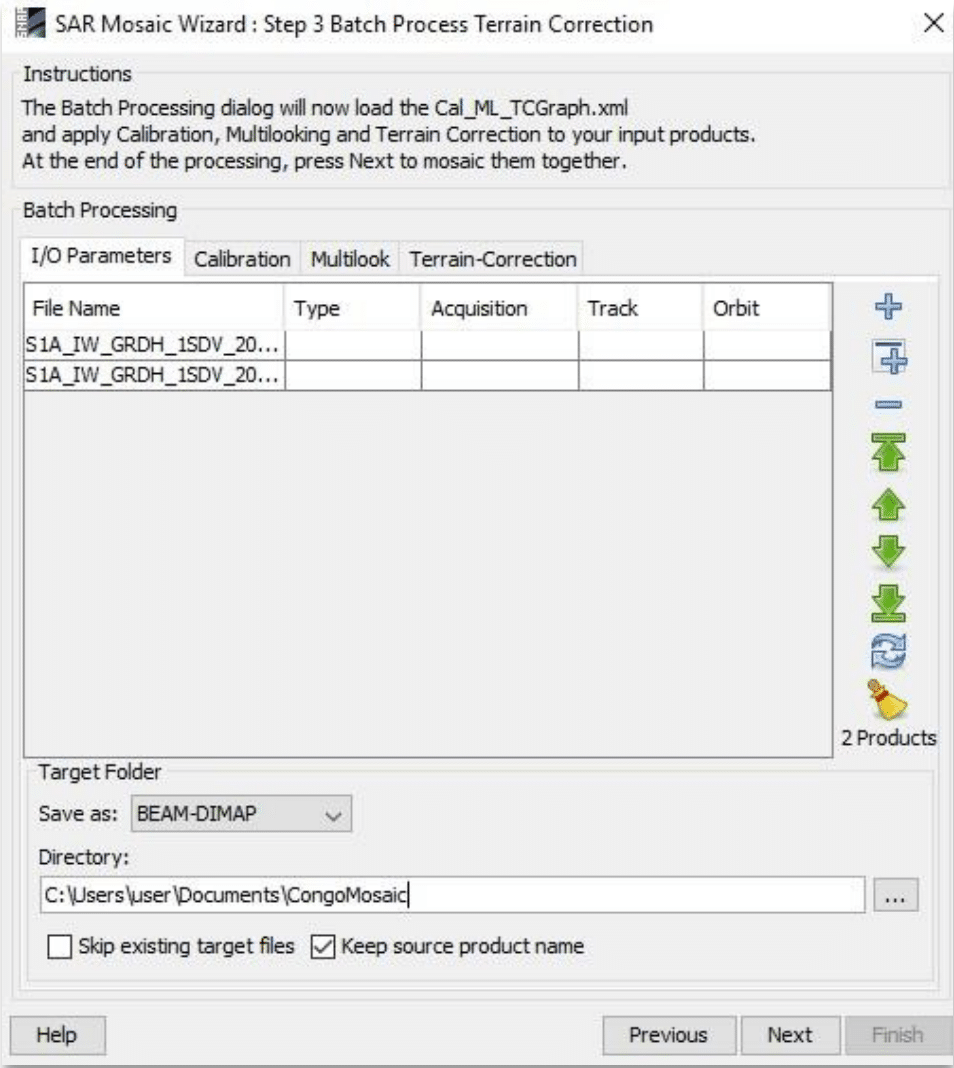
- Click Next. The Batch Process Terrain Correction window will appear.
- This batch process will apply another series of pre-processing operations to each of the swaths. The swaths will be calibrated to sigma naught, multi-looked and geocoded.
- In the I/O Parameters tab, ensure the output directory is correct.
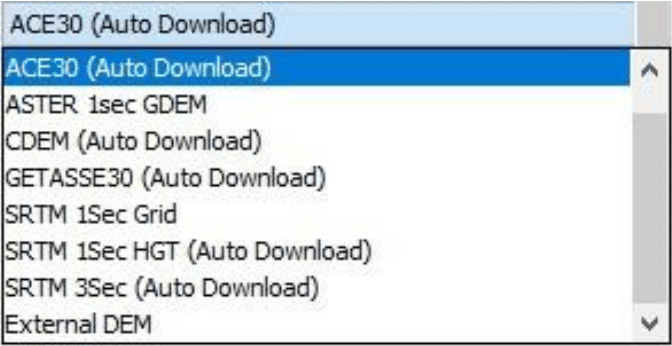
- If your products are above 60° North, you will need to open the Terrain-Correction tab and select a different Digital Elevation Model, such as ACE30. In this case, our products are near the equator and you can leave the tabs and parameters alone. A DEM from the SRTM 3Sec set will be used. The other parameters can be left as they are.
- Next. Allow the products to undergo the pre-processing operations.
- In the following SAR Mosaic window, leave all parameters as default.
- Click Finish and allow the mosaic to finish processing.
- The mosaic should appear in the Product Explorer as a new product. Expand the folder and open one or both of the bands to view the combined product.