

Background
Amazon Web Services (AWS) S3 is object-based storage, where data (objects) are stored in S3 buckets. The AWS S3 Standard storage class provides safe, scalable, fast, and inexpensive storage and retrieval of any amount of data. The Standard class is designed for data that are accessed frequently. Other storage class options are available for different data storage requirements. Read more about the different types of storage available and their uses.
S3 has a basic monthly cost for storing data and this varies by AWS region. Transfer charges are applied for data moved out of an S3 bucket to the Internet, as well as data transferred between AWS regions, though interregional transfer charges are much less. There are no charges for data uploaded to a bucket or transferred between S3 buckets (or any AWS services) in the same region.
This recipe demonstrates the basic concepts of S3 buckets using the Amazon S3 console.
Important to remember: There are no charges for creating an S3 bucket, but there are costs for storing data (objects) and transferring data out of a bucket.
Prerequisites
You must have an AWS account. If you don’t have an account, create one now.
Note: You will need to provide credit card information for your new account.
Steps for Creating an S3 Bucket
- Sign in to AWS. The AWS Management Console will open.
Hint: Clicking on the AWS logo in the upper-left corner will open the Management Console from any AWS window.
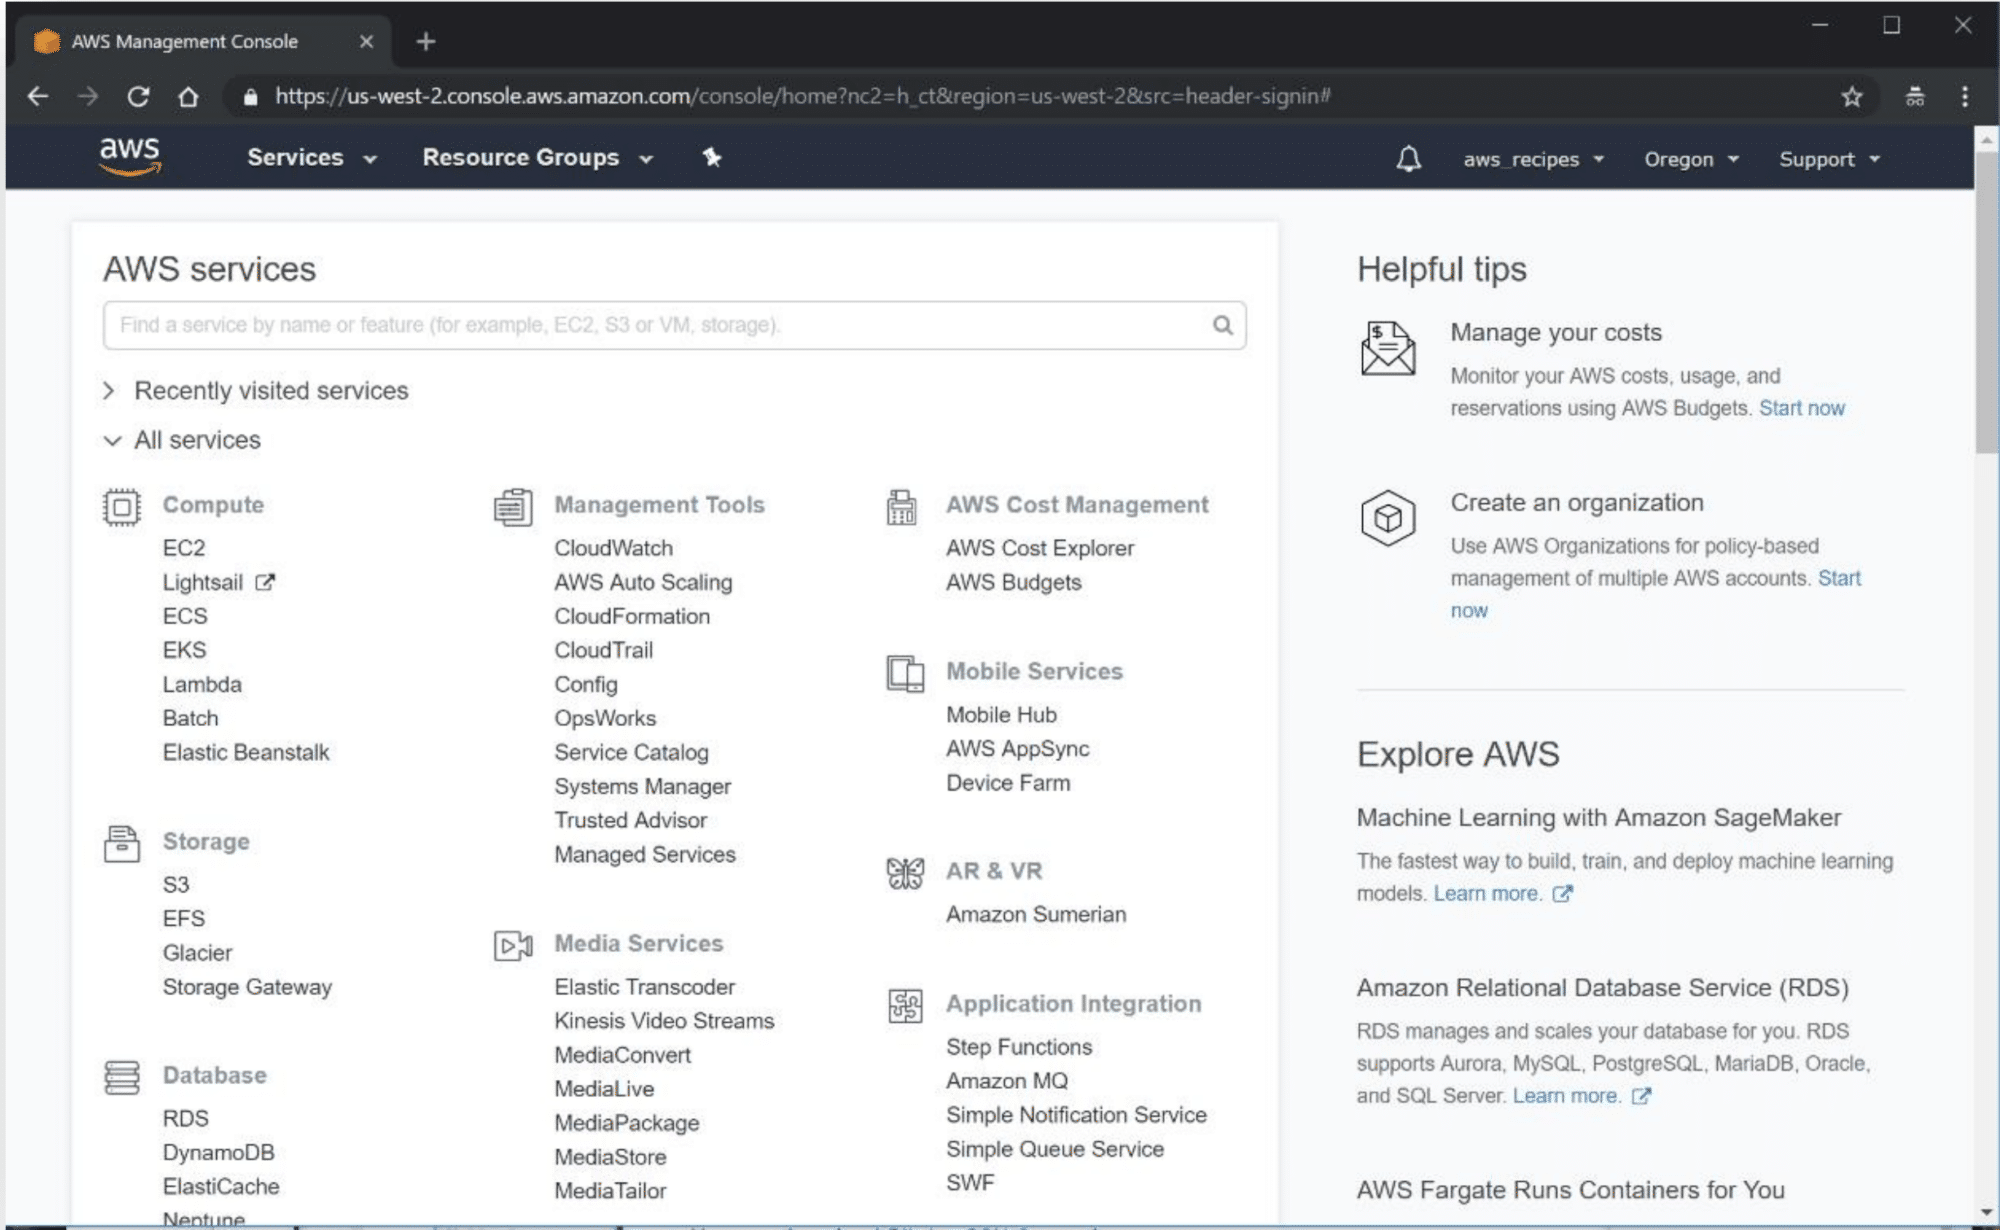
- Under Find Services, type “S3” in the search box and click on S3 Scalable Storage in the Cloud.

- In the S3 console, click on Create bucket.

- In the Create bucket pop-up, enter a Bucket name (1).
- The bucket name has to be unique among all AWS bucket names.
- Once created, the name cannot be changed.
- Choose a name that’s descriptive of what the contents will be, particularly if you will be using more than one bucket.
- For Region (2), select US East (N. Virginia) for this recipe.
- Remember, there are no costs for data that are transferred between AWS services within the same region. So, for example, if your bucket will be used to store data to be processed by an EC2 Instance, make sure both are located in the same region.
- In the Create bucket pop-up, enter a Bucket name (1).

- Click Create (3).
- Your new bucket is displayed in the S3 buckets console.
- Click Create (3).

Adding a File to a Bucket
- In the S3 buckets console, click on the bucket name to open the bucket.
- The bucket contents window shows that the bucket is empty.
- Click on Upload.
- In the S3 buckets console, click on the bucket name to open the bucket.

- In the Upload pop-up window, you have the option to drag and drop files into the bucket, or to click on Add files and navigate to the location of the files on your computer.

- When you have selected the files to add to your bucket, click on Upload.
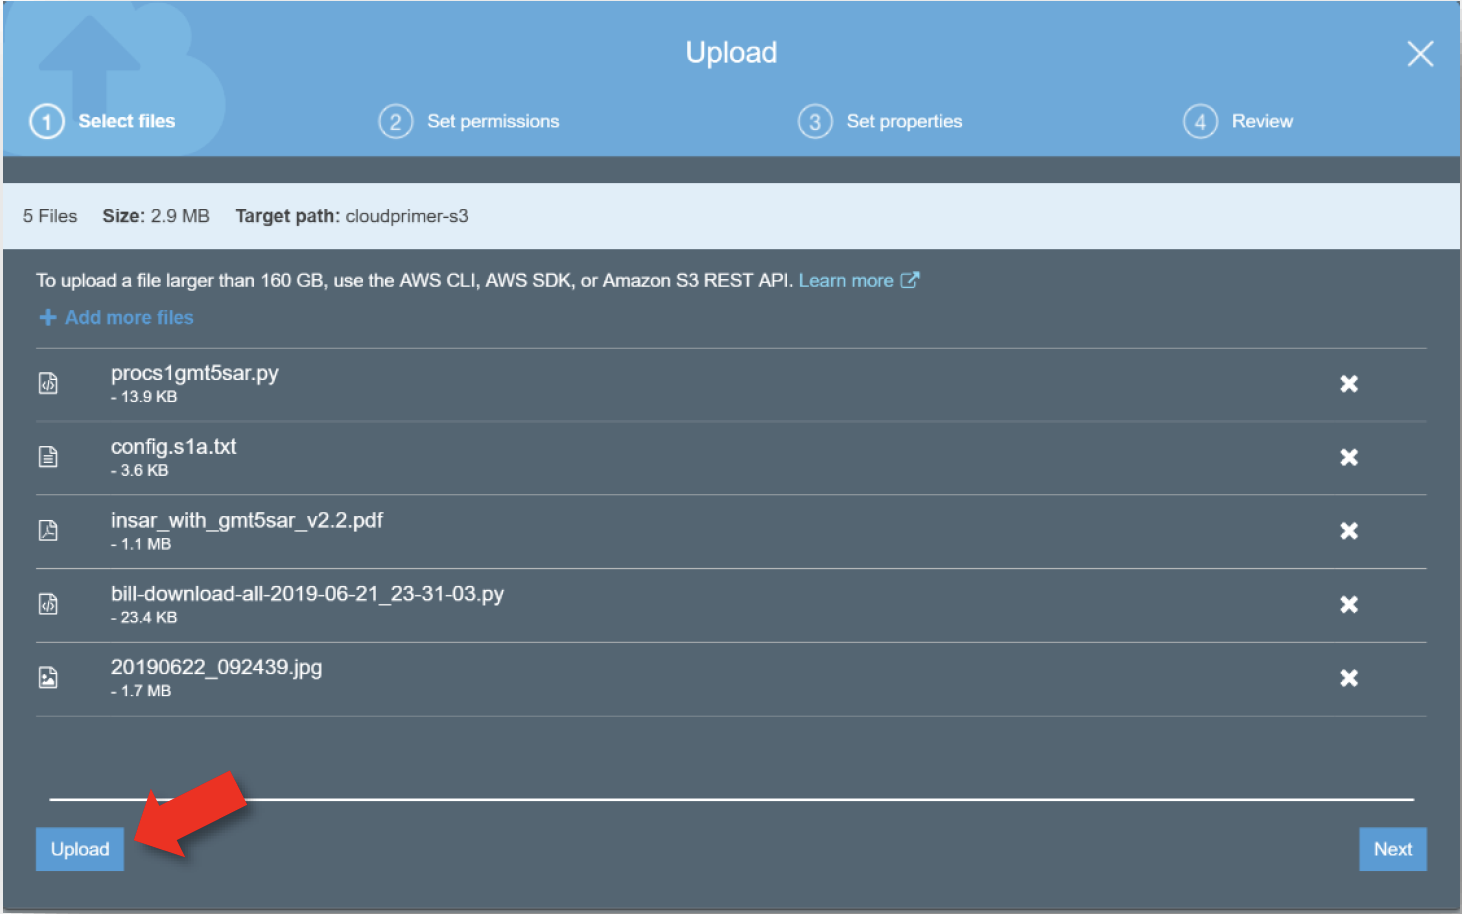
- When the upload is complete, the files appear in your bucket.

- Select the checkbox next to a filename to view information on the file.

Download a File from a Bucket
- Open a bucket to display the contents.
- Check the box in front of a file to open the file information window.
- Click on Download.

Working with Files in a Bucket
- Files can be organized in a bucket by creating a folder and copying and pasting files into the folder.
- Click on Create folder (1), give the folder a name (2), then click Save (3).

- Check the box in front of the file(s) you want to move to the new folder (1).
- Click on Actions (2) to open the dropdown menu, then click Copy (3).
- Click on the folder name to open the folder (4).
- Click on Actions, then click Paste.
- Use the browser back arrow to return to the main level of the bucket (or use the breadcrumbs at the top of the bucket window to move one level up).
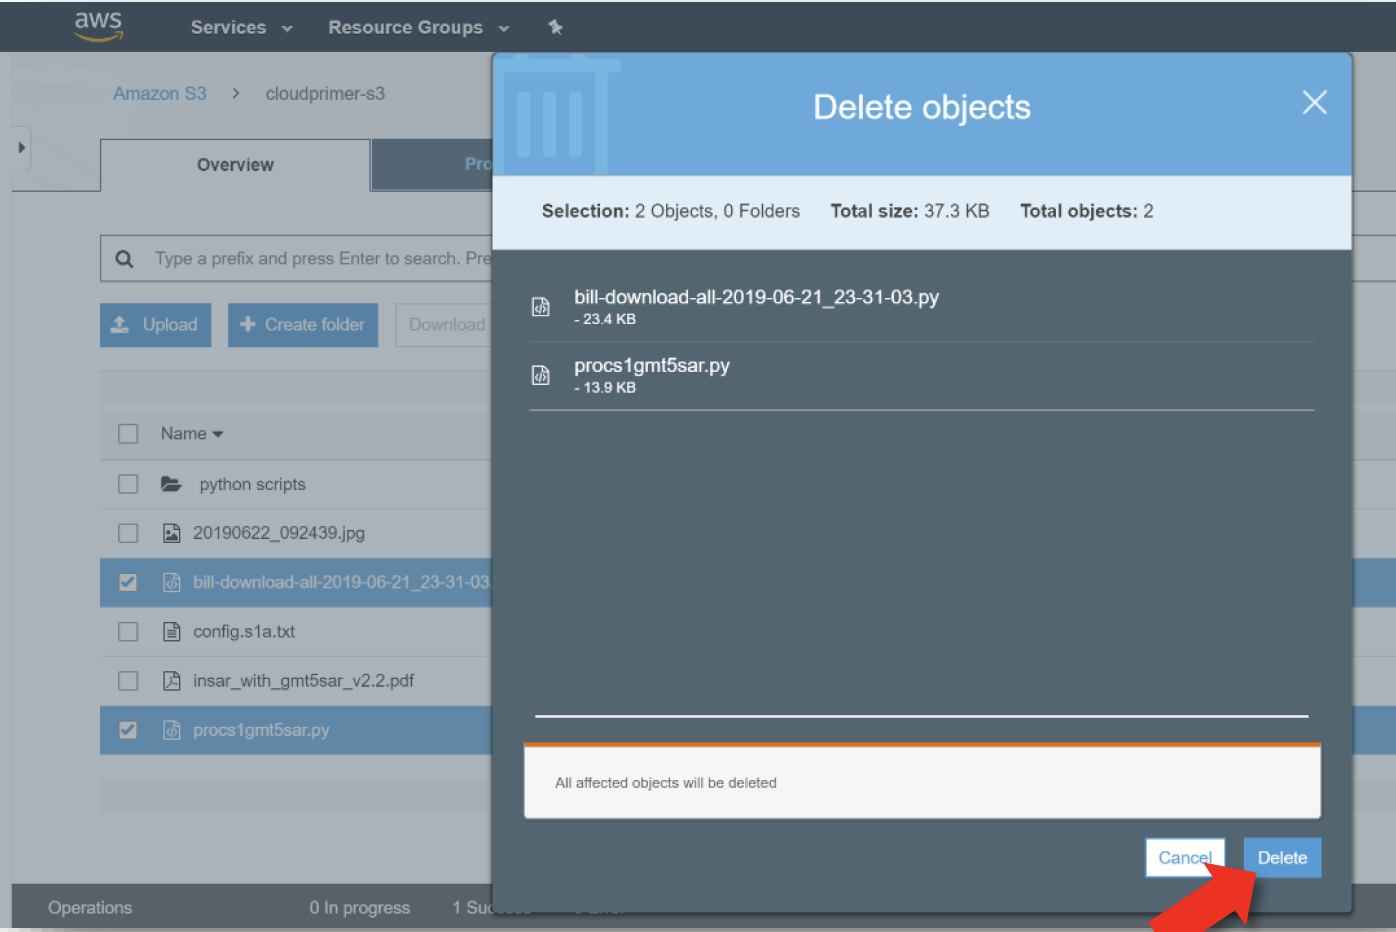
- Select the file(s) you moved, click on Actions, then click Delete.
- Confirm that you want to delete the files in the Delete objects pop-up window. Click Delete.

Deleting a bucket
Note: Deleting a bucket deletes the bucket as well as its contents. If you want to keep the bucket for future use and preserve the name, you can delete the content files individually. Or you can empty the bucket, which deletes the contents without deleting the bucket.
To delete files from a bucket
- Use the steps outlined at the end of Working with Files in a Bucket.
To empty a bucket
- In the S3 buckets list, check the box in front of the bucket name.

- Click on Empty.

- In the Empty bucket pop-up window, type or copy and paste the bucket name, then click on Confirm.

To delete a bucket
- In the S3 buckets list, check the box in front of the bucket name.
- Click on Delete.

- In the Delete bucket pop-up window, type or copy and paste the bucket name, then click on Confirm.
